
Chapter 19 Shiny Server on AWS (with Docker)
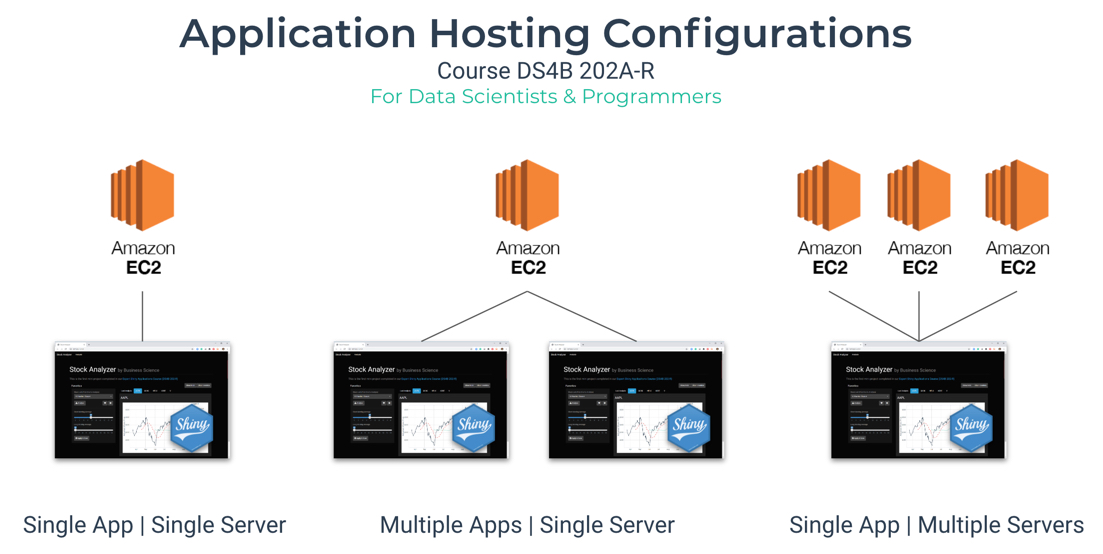
This document covers setting up Shiny Server to run 1 or more applications inside of a Docker Container on a single AWS EC2 Instance. By the end of this tutorial you will be able to run multiple shiny applications running on Port 80 of your AWS EC2 Server.
Note - We will cover the Single EC2 Server configurations only; Multiple Server configurations are beyond the scope of this course.
19.1 Prerequisites
You must have:
- EC2 Server with the 3
ShinyApps Connected to your GitHub Remote Repository (Private) - Docker image
mdancho/shinyauth:lateston your EC2 Instance
These requirements will be satisfied if you have followed the GitHub Setup and Cloning Instructions in the previous chapters.
19.2 AWS Preparation
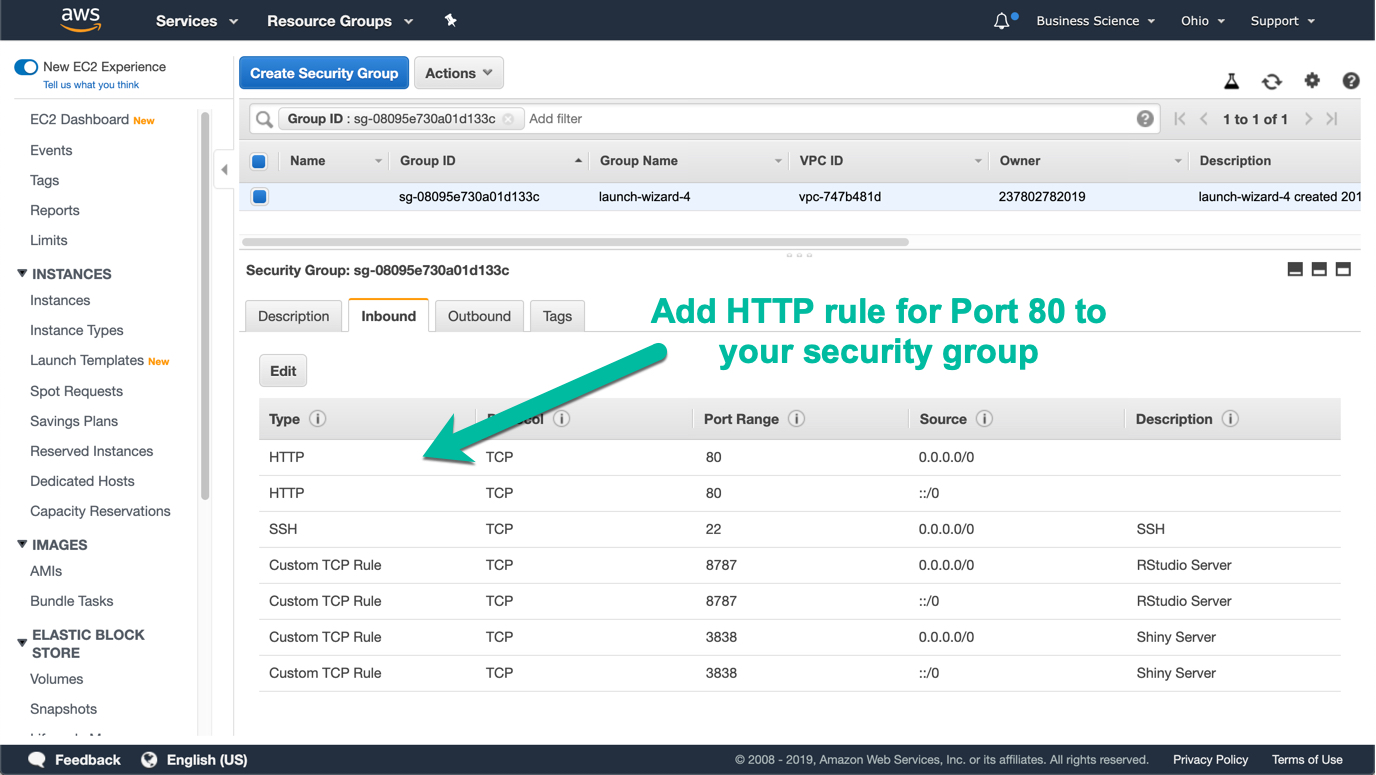
Port 80 is the default port for HTTP traffic. This opens the base URL of your server, so you don’t need to type specific port numbers (e.g. 3838 and 8787) like we’ve been doing.
- Navigate to your AWS Security Group that your EC2 Server Instance is under
- Add an HTTP Rule to open Port 80 of your AWS EC2 Server
19.3 Shiny Server Hosting Model
Next we need to discuss the basic of how Shiny Server hosts applications. This is called the Hosting Model. There are two components:
- App Directory Configuration -
/srv/shiny-server/ - App Logs -
/var/log/shiny-server/
19.3.1 App Directory Configuration
- Apps are contained inside a
dockercontainer at/srv/shiny-server. - The directory structure looks like this:
+---/srv/shiny-server
|   +---stock_analyzer_mongo_atlas
|       +---app.R
|   +---stock_analyzer_local_data
|       +---app.R
|   +---test_app
|       +---app.R
|   +---index.html
What’s happening in this directory structure?
- Shiny Server App Directory: Shiny Server looks for any applications in the
/srv/shiny-serverfolder - Folders with app.R files are apps: Each folder with a
app.Ris run as ashinyapp - Index HTML File (optional): This is an index file that appears when the user goes to the
SERVER_ADDRESS. It can be used as an HTML page to show which apps are available to the user.
19.3.2 Log Configuration
Log files contain information about errors and warnings that the application(s) experience. If you ever have an issue with your application, you need to review your latest log file for the application.
- Log files are contained inside a
dockercontainer at/var/log/shiny-server/.
+---/var/log/shiny-server/
|   +---stock_analyzer_mongo_atlas-log1.log
|   +---stock_analyzer_local_data-log1.log
| +---test_app-log1.log- Navigate to the EC2 Directory that we map (using linked volumes
-v) to the docker container’s log directory.- Use
ls -lhto list the log files - Use
catto investigate the logs.
- Use

19.4 Investigating the Hosting Model Interactively via Docker
Let’s get a closer look at what happens when we set up shiny server.
- Shutdown any containers running on your EC2 Server.
- Run a docker container on Port 3838 with no linked volumes.
- Enter the container - this is a new concept. We can actually enter the container using the
bashclient.
- This opens up a root user inside of the Docker Container. Navigate the the
/srv/shiny-server. We can see all of the sample apps that shiny server comes with.
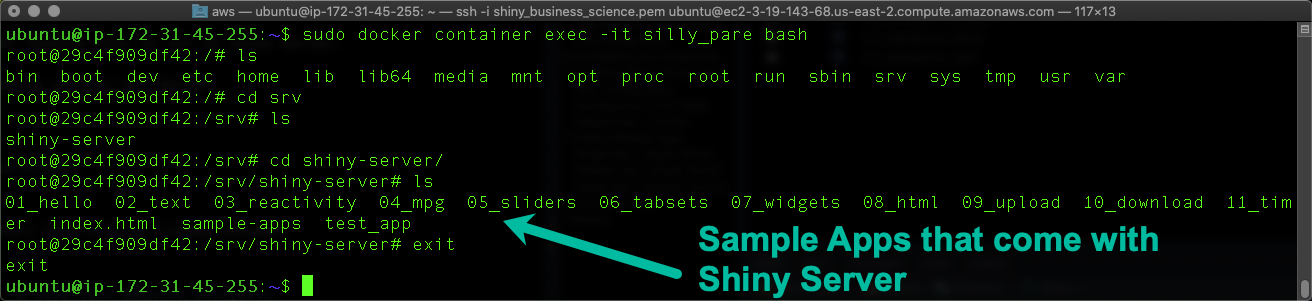
- Exit the root user using the
exitcommand.
19.5 Launching Shiny Server Apps with Docker
We’ll cover the “single app | single server” configuration first in both development and deployment modes.
19.5.1 URL Configuration
When apps are run with docker run the apps are hosted at the URL:
Examples:
| SERVER ADDRESS | PORT | App Folder | URL |
|---|---|---|---|
| ec2.compute.amazonaws.com | 3838 | test_app | ec2.compute.amazonaws.com:3838/test_app |
| shiny.business-science.io | 3838 | test_app | shiny.business-science.io:3838/test_app |
| shiny.business-science.io | 80 | stock_analyzer | shiny.business-science.io/stock_analzyer |
19.5.2 Development - Port 3838
In development, Shiny Server runs normally on port 3838. This runs the app on Port 3838 of the EC2 Server
sudo docker container run --rm  -p 3838:3838 \
-v /home/ubuntu/business_science_apps/test_app/:/srv/shiny-server/test_app \
-v /home/ubuntu/log/shiny-server/:/var/log/shiny-server/ \
mdancho/shinyauth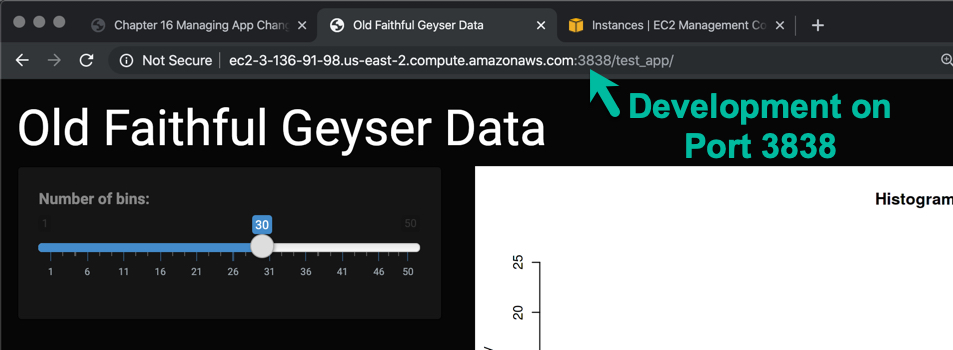
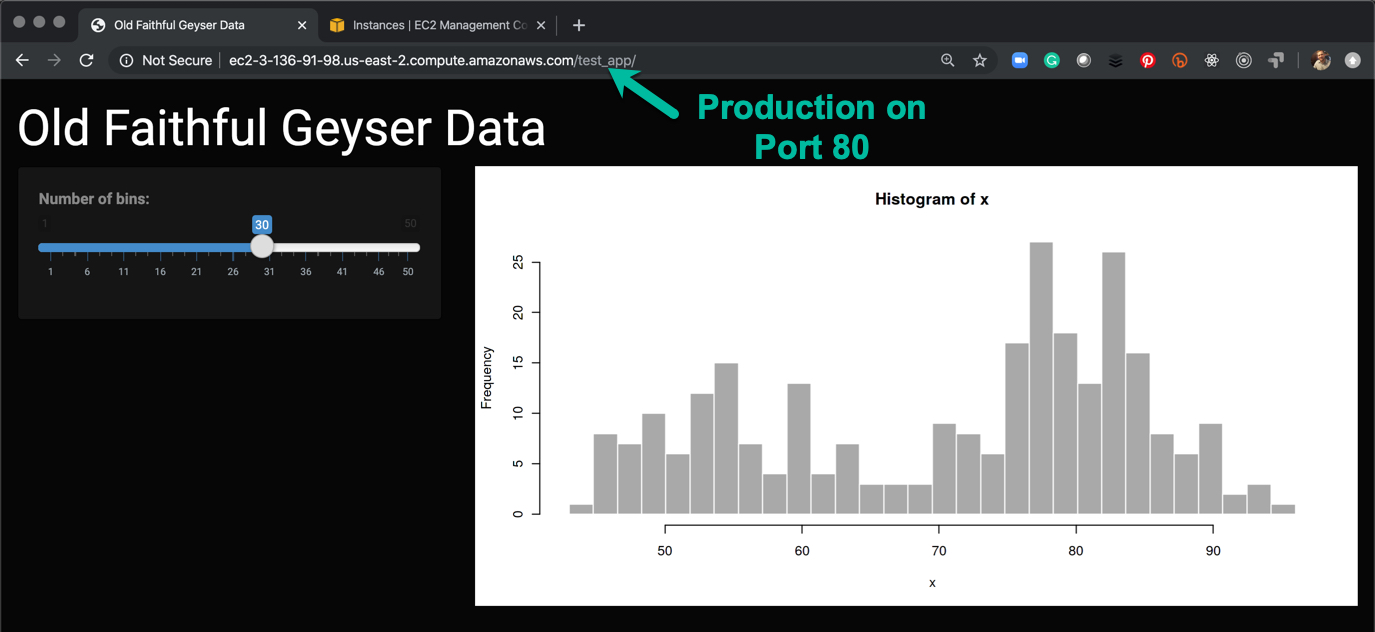
19.5.3 Deployment - Port 80
Port 80 is the Default Port for HTTP, which doesn’t require the port number to be listed in the URL. This is what permits websites like www.business-science.io to operate without a port number at the end (e.g. www.business-science.io:80). This is why in production we run apps on Port 80.
- This runs the app in detached mode on Port 80, which is the default HTTP port
- Important Note - Make sure to open Port 80 in AWS, otherwise you will not be able to run the application on the default HTTP(S) port.
sudo docker container run -d -p 80:3838 \
-v /home/ubuntu/business_science_apps/test_app/:/srv/shiny-server/test_app \
-v /home/ubuntu/log/shiny-server/:/var/log/shiny-server/ \
mdancho/shinyauth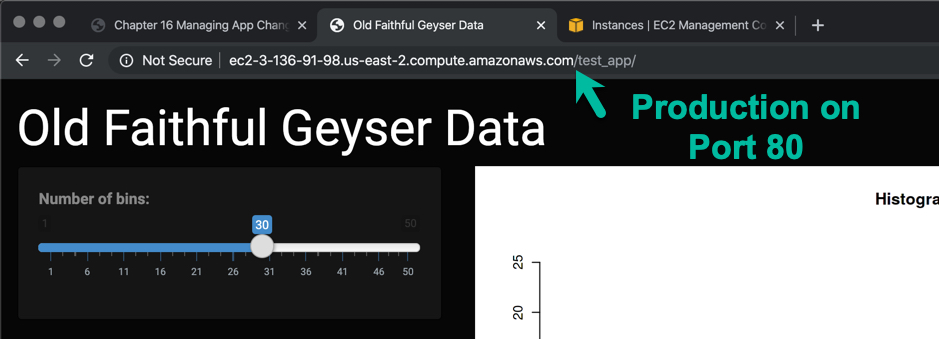
19.6 Hosting Multiple Apps
Next, let’s discuss different configurations for managing one or more applications.
19.6.1 Single App | Single Server
- Best for Low-Med Volume App. Low concurrency. Low-moderate compute time.
19.6.2 Multiple App | Single Server
- Best for Low Volume Apps: Low concurrency. Low compute time.
Method 1 - Link Entire Directory
- Pro - Only two linked volumes; One for the entire directory of apps, and one for the log directory
- Con - Need to have individual app directories match the end of the URL you desire (e.g. “stock_analyzer_mongo_atlas” may not be an ideal URL that you want your users to see)
sudo docker container run -d -p 80:3838 \
-v /home/ubuntu/business_science_apps/:/srv/shiny-server/ \
-v /home/ubuntu/log/shiny-server/:/var/log/shiny-server/ \
mdancho/shinyauth
Method 2 - Link Individual Apps as Separate Linked Volumes
- Pro - Can specify the URL end (e.g. /stock_analyzer)
- Con - More complex docker commands; each app has a separate volume link
19.6.3 Single App | Multiple Servers
Best for High Volume Apps. At this point, your application is scaling, which is a good thing (more users, means more value is being generated).
Unfortunately, this is beyond the scope of this course and is migrating into Development Operations (DevOps). Seek a qualified dev-ops person to help you with:
- Elastic Container Service (ECS), Amazon Kubernetes Service (EKS), and Kubernetes - Container orchestration for multiple EC2 Instances as clusters and/or containers as clusters
- Elastic Load Balancer (ELB) - Distributes the load accross multiple servers
- Auto Scaling Groups - Monitors the status of EC2 instances. If one goes down, it makes a new one. Result = Self-Healing = Zero-Downtime.
- Amazon Cloud Formation - Automates the build of EC2 Instances based on a template.
19.7 Common Issues
- Security Groups & Firewalls - We saw that Port 80 would not load until opened the HTTP port on the AWS Security Group. This is an extremely common issue - not having the EC2 Instance port open.
- Backend Databases - Connections and Permissions - Currently we cannot load the Stock Analyzer applications. We’ll investigate working with backends next.
- Docker Ports & Volumes - Making sure that you have your docker containers linking the correct port numbers and volumes between your host (EC2 Server) and virtual container.
How to Trouble Shoot?
- Check the
shinylog files - This will tell you where the shiny app failed in the code. - Check the AWS Ports in the Security Group - Make sure the port you are trying to use is open.

19.8 Wrapup
Congrats! You now have 3 applications being hosted on your AWS EC2 Instance. Only 1 is working, but we’ll cover how to setup the backend databases next.
Become a Expert Shiny Developer with AWS
Have a question? Leave a comment.