Chapter 22 Domain Setup & SSL Certificates
Chances are your organization owns a domain. This course will show you what it takes to create a subdomain that can be used to add an application library (a number of Shiny applications). The goal in this section is to setup your shiny application library as a subdomain of an existing domain that you own. You will:
- Create a Domain
- Create a Subdomain
- Configure your subdomain to point to your Elastic IP Address for your AWS EC2 Server
- Downloaded an SSL Certificate and stored the Certificate
.pemand.keyfiles locally
22.1 Prerequisites
Purchase ownership of a domain - I will point you to either AWS Route 53 or namecheap.com for you to purchase a domain. It’s essential to have ownership of a domain to complete the remaining sections of the course.
Have 3 Shiny Apps hosted on AWS EC2 - If you’ve completed the course up to now, this requirement is satisfied.
Have running docker containerson AWS EC2 - At a minimum, have Shiny Server running on port 80 of your EC2 Server.

22.2 Definitions
Chances are your organization owns a domain. This course will show you what it takes to create a subdomain that can be used to add an application library (a number of Shiny applications).
Domain- The domain is what users use to access your website or web applications. An example is www.business-science.io.Subdomain- The subdomain is a method to add additional related domains to your website. You can add as many as you like, but they always must end in the additional domain. An example is apps.business-scinece.io.Application Library- This is a term I use for a subdomain that houses multiple applications for your organization.Domain Name System (DNS) Service- Third-party providers that help manage domains and offer supporting services like SSL Certificates.Secure Socket Layer (SSL) & SSL Certificates- Used to enable secure HTTPS (vs HTTP, which is unsecure). SSL is a global security technology standard that enables encrypted communication. Any time a user of an application enters user name and password, SSL is needed to encrypt this private information. SSL Certificates are how servers encrypt the communication. Every server must have an SSL certificate to enable
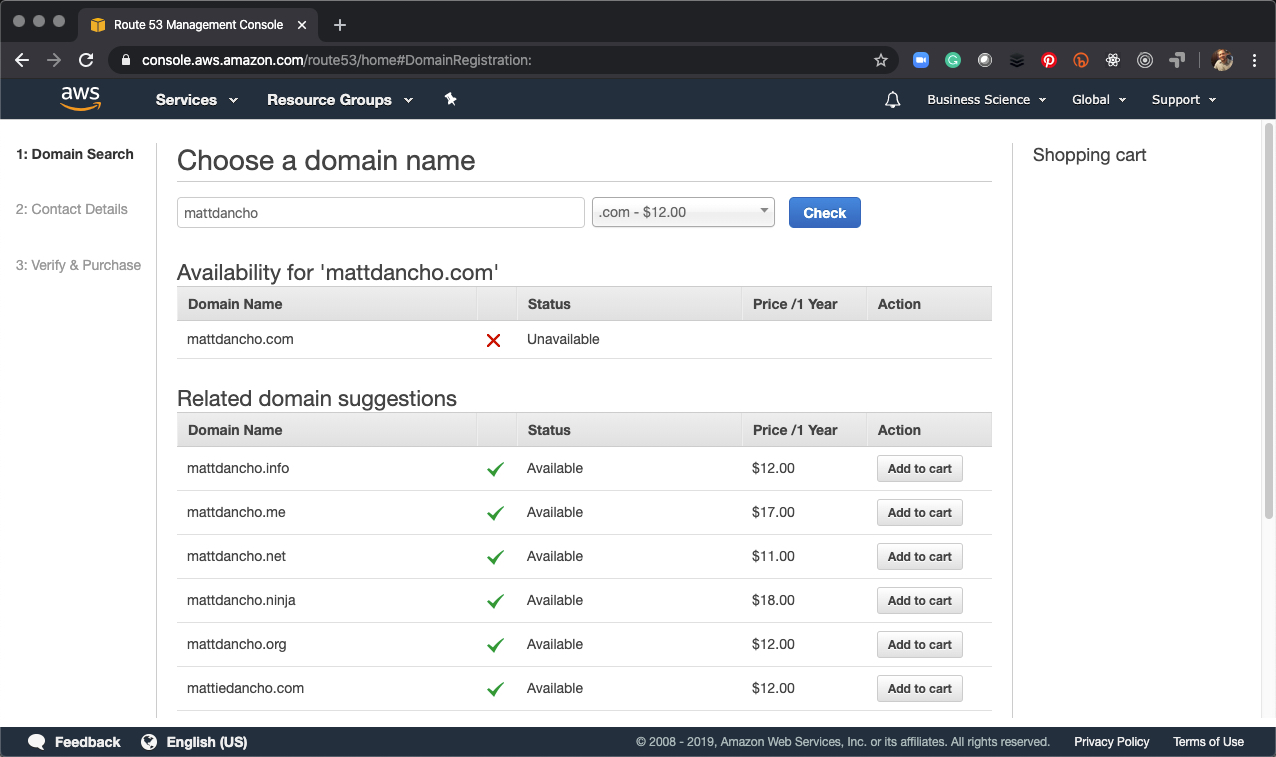
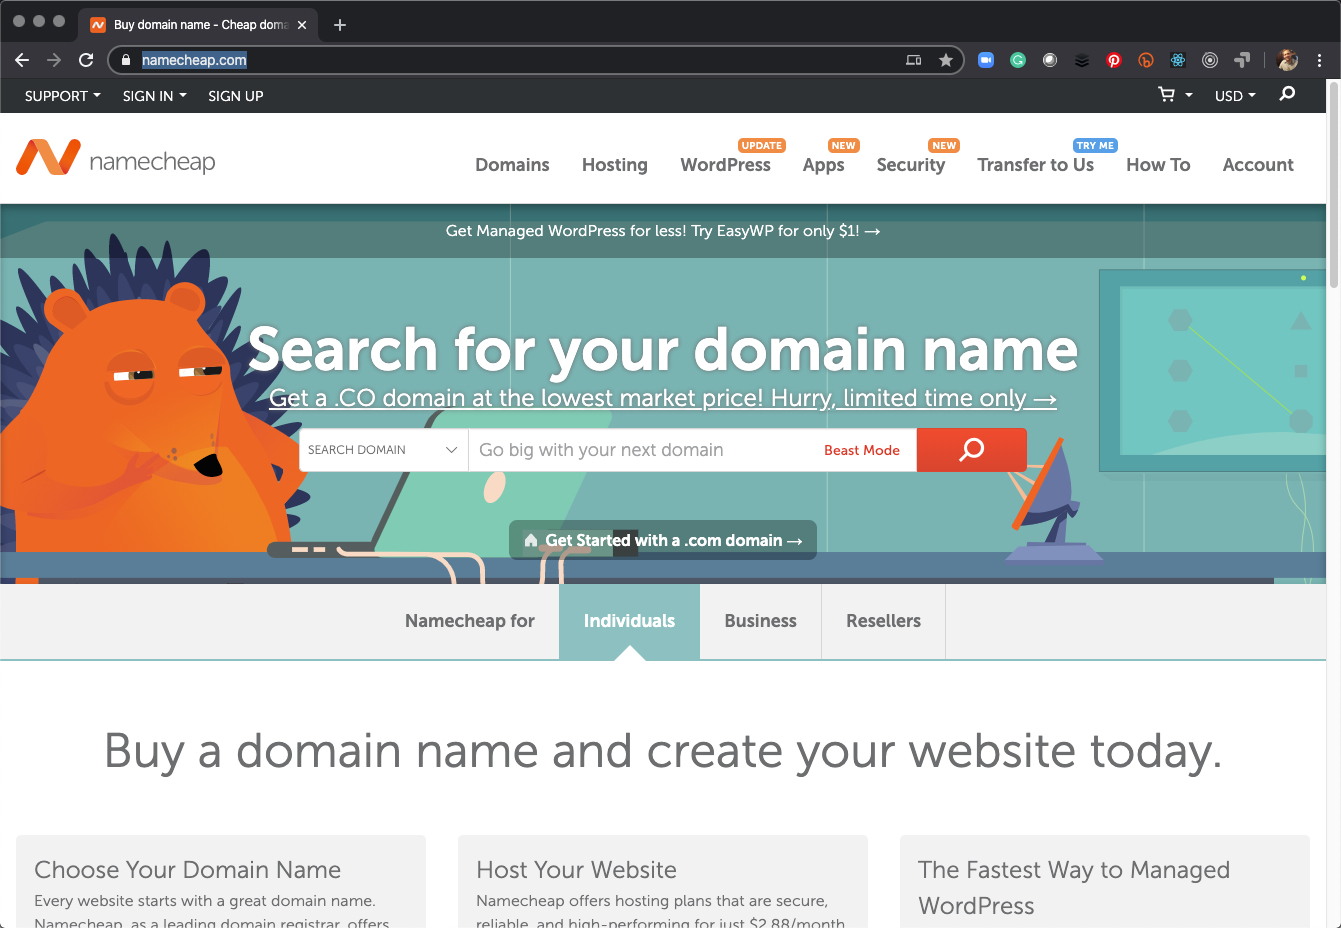
22.3 Purchasing a Domain
For the course, you need to have a domain to get experience performing basic networking and security operations. A domain can be purchased from AWS via the Route 53 service or a company such as Namecheap.com for approximately $10 - $15 USD.
Route 53
Namecheap
22.4 DNS Services
DNS services are used to setup subdomains and security via SSL (discussed next). DNS Services can be managed inside of AWS via Route 53 & Certificate Manager or externally from AWS via a product such as CloudFlare. The advantage of Cloudflare is that it’s free.
AWS Route 53 + Certificate Manager
Pros - Inside of AWS.
Cons - Has a high cost to purchase SSL Certificates.
Cloudflare (Recommended)
Cloudflare is a content delivery networks service (DNS). We will use Cloudflare for the Networking and Security Segments of the course because it is free to get SSL Certificates. You will need to create an account and setup your site with Cloudflare to complete the remaining portion of the course.
22.5 Creating a Subdomain with Cloudflare
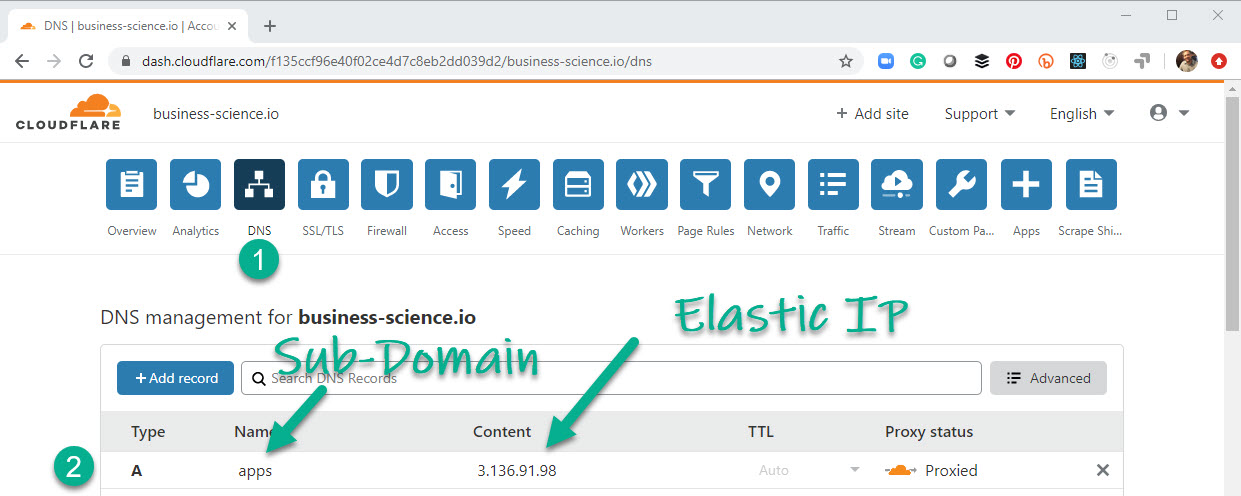
22.5.1 Step 1 - Create a Subdomain
- Navigate to DNS Services
- Add an A-Record with a subdomain name and the Elastic IP Address for your AWS EC2 Server. This creates your subdomain. Note I use “shiny” as my subdomain of www.business-science.io in the course.
Important Note: It’s important to add an Elastic IP Address because you may eventually upgrade your server instance to a more powerful server at which point you will not want to break your website. The transition can be fully managed on AWS without needing to update Cloudflare’s IP that points to your subdomain. This helps have zero-downtime during upgrades.
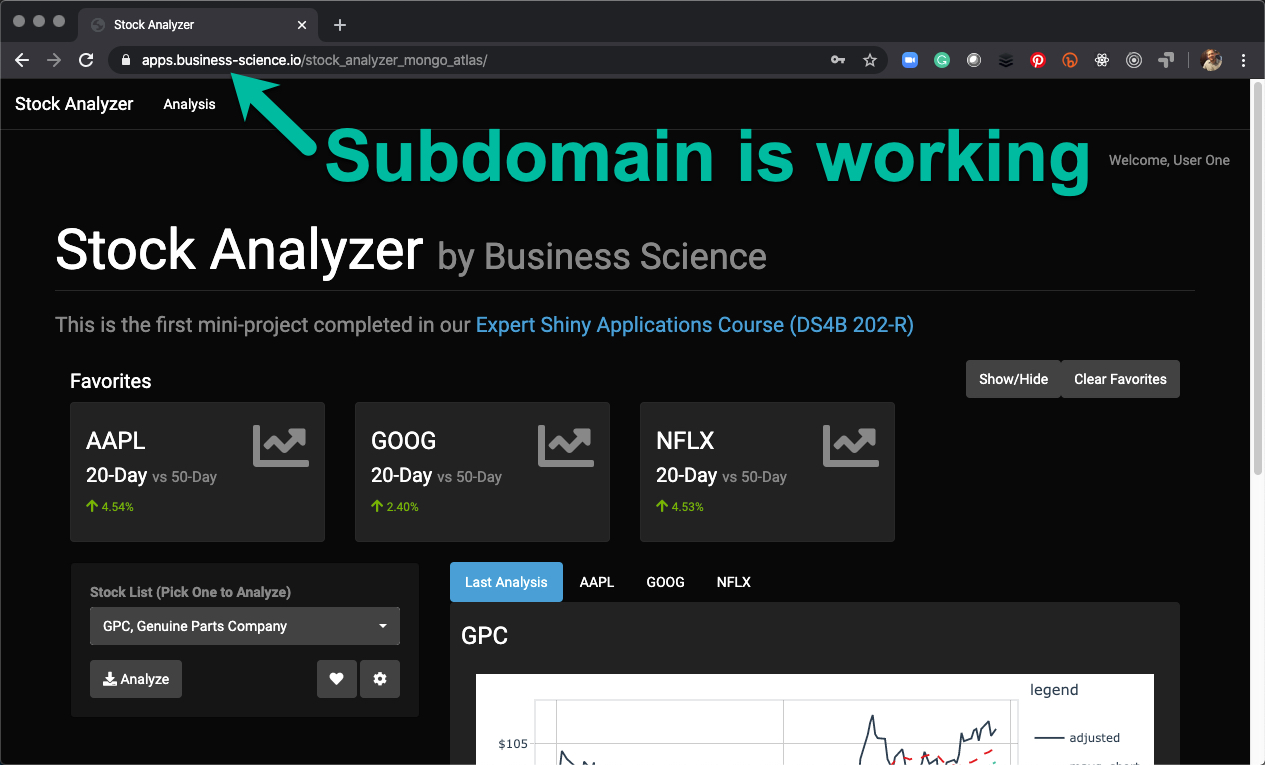
22.5.2 Step 2 - Test your Subdomain
Type your subdomain into your URL along with the port you’ve assigned in Docker
Example:
- Your sub-domain is “apps”
- Your domain is “business-science.io”
- Your docker container is pointing to Port 80 (Default HTTP port)
- Your docker container has shiny server running with an app called stock_analyzer_mongo_atlas
And here’s what it looks like.
22.6 SSL Certificate Services
We need a SSL Certificate to enable HTTPS, which is essential for websites that collect user information. HTTPS technology enables encrypted communication between servers via SSL (Secure Socket Layer).
AWS Certificate Manager
- Pros: Inside of AWS, can manage multiple certificates with varying levels of security
- Cons: Very costly depending on security needs
Cloudflare SSL Services
- Pros: Free!
- Cons: External to AWS (but this is perfectly fine)
22.7 Getting a Free SSL Certficate from Cloudflare
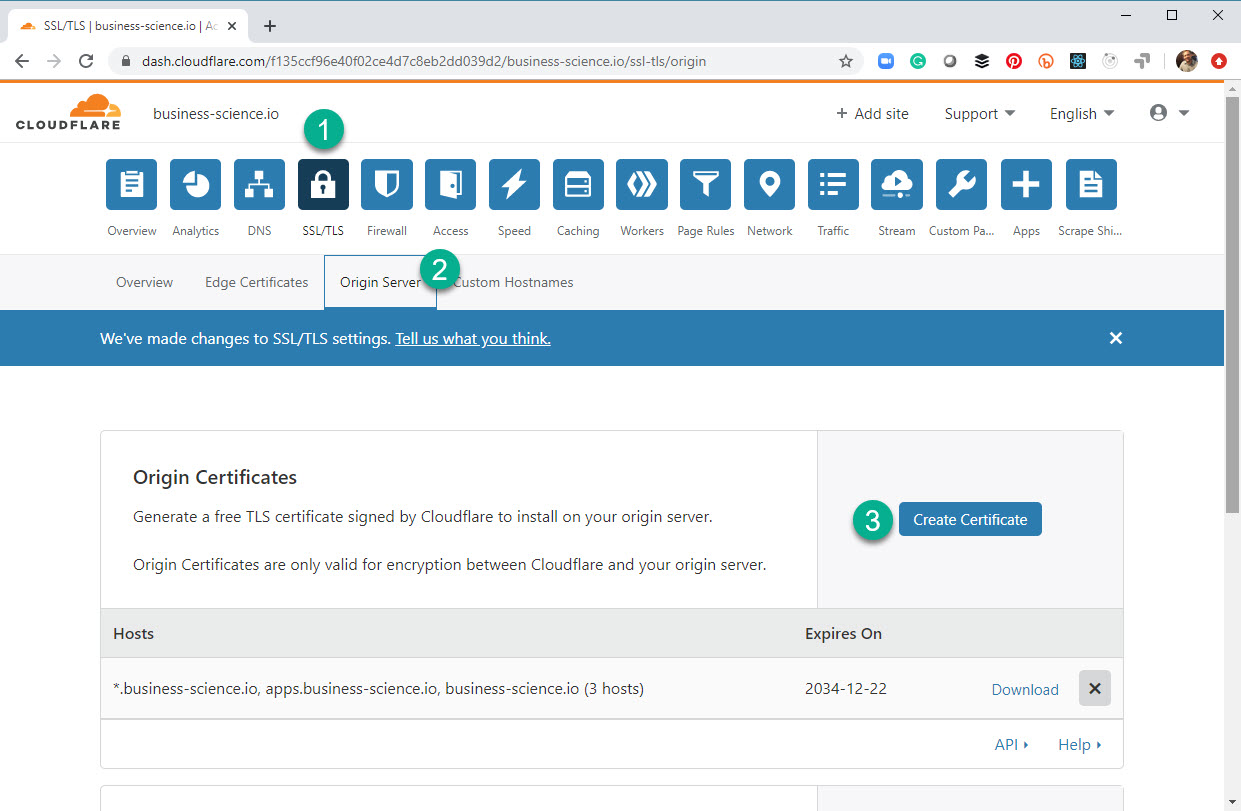
22.7.1 Step 1 - Create the Certs
- Navigate to SSL/TLS
- Select Origin Server
- Create a Certificate
22.7.2 Step 2 - Save the Certs as .pem and .key files
The certificates should be saved in two separate files in a secure location (don’t lose these):
your_domain.pem- Origin certificate fileyour_domain.key- Private key file
22.8 Wrapup
Congrats! In this tutorial, you’ve successfully:
- Created a Domain
- Created a Subdomain
- Configured your Subdomain to point to your Elastic IP Address for your AWS EC2 Server
- Downloaded an SSL Certificate and stored the Certificate
.pemand.keyfiles locally
Next, we’ll install the SSL certificates and setup the webserver for HTTPS using a host of technologies include NGINX and Docker Compose.
Become a Expert Shiny Developer with AWS
Have a question? Leave a comment.