Chapter 5 Connecting to EC2 with SSH (Secure Shell)
These instructions will help you connect to your ubuntu EC2 server on AWS via a Secure Shell (SSH) using a Command Line Interface (CLI).
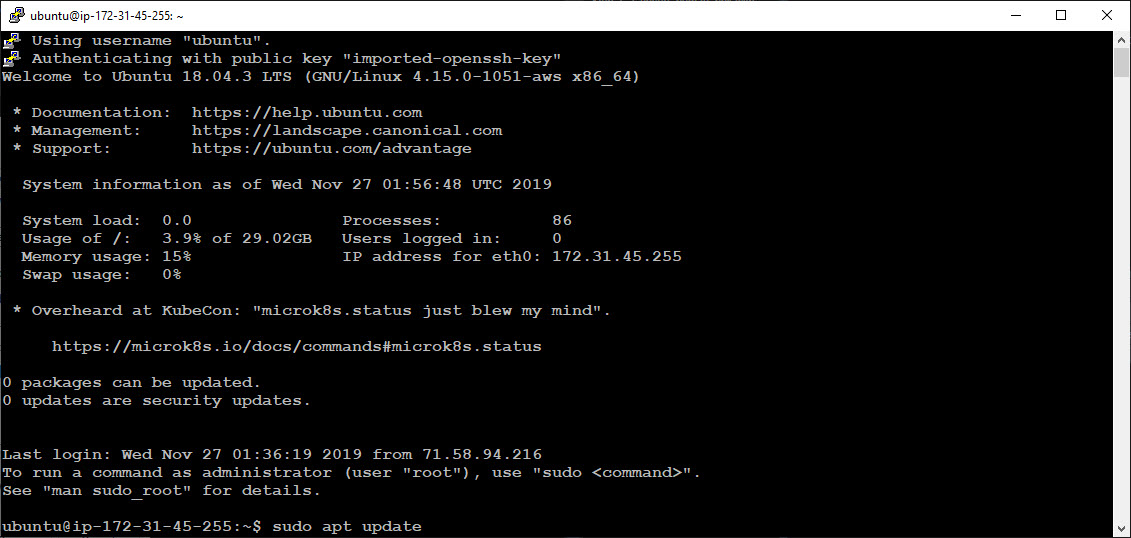
Figure 5.1: Secure Shell (SSH) with Command Line Interface
5.1 Windows - Putty
Windows Putty Installation - These instructions are a simplified version of AWS’s Putty Connection instructions for the Ubuntu AMI.
5.1.1 Step 1 - Download Putty
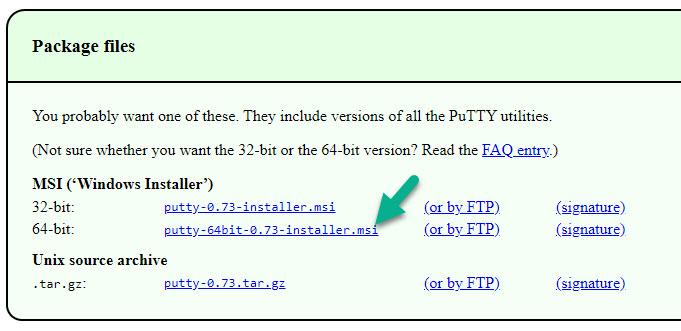
Download Putty from putty.org. Select the version that matches your version of Windows.
5.1.2 Step 2 - Convert .pem to .ppk with PuttyGen
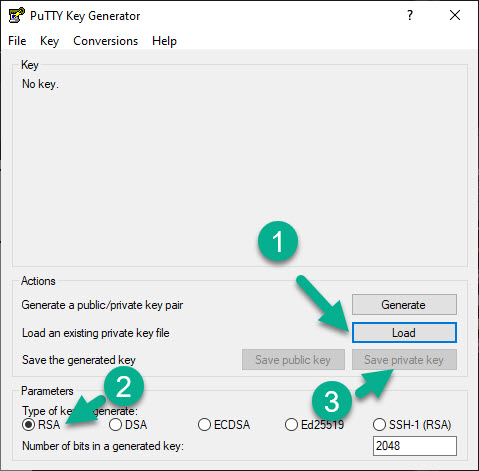
Open PuttyGen to convert the .pem file to a .ppk file. Load the .pem by navigating to your AWS Keys folder (you make this and store the key here during the Key-Pair step). Once loaded, select “RSA” and click “Save Private Key”. This will generate a .ppk file.
5.1.3 Step 3 - Connect to EC2 with Putty
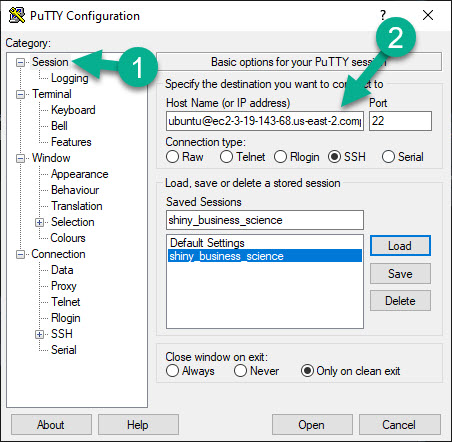
Open Putty to SSH into (connect to) the EC2 Server via the Command Line Interface (CLI).
5.1.3.1 Part 1 - User @ EC2 DNS
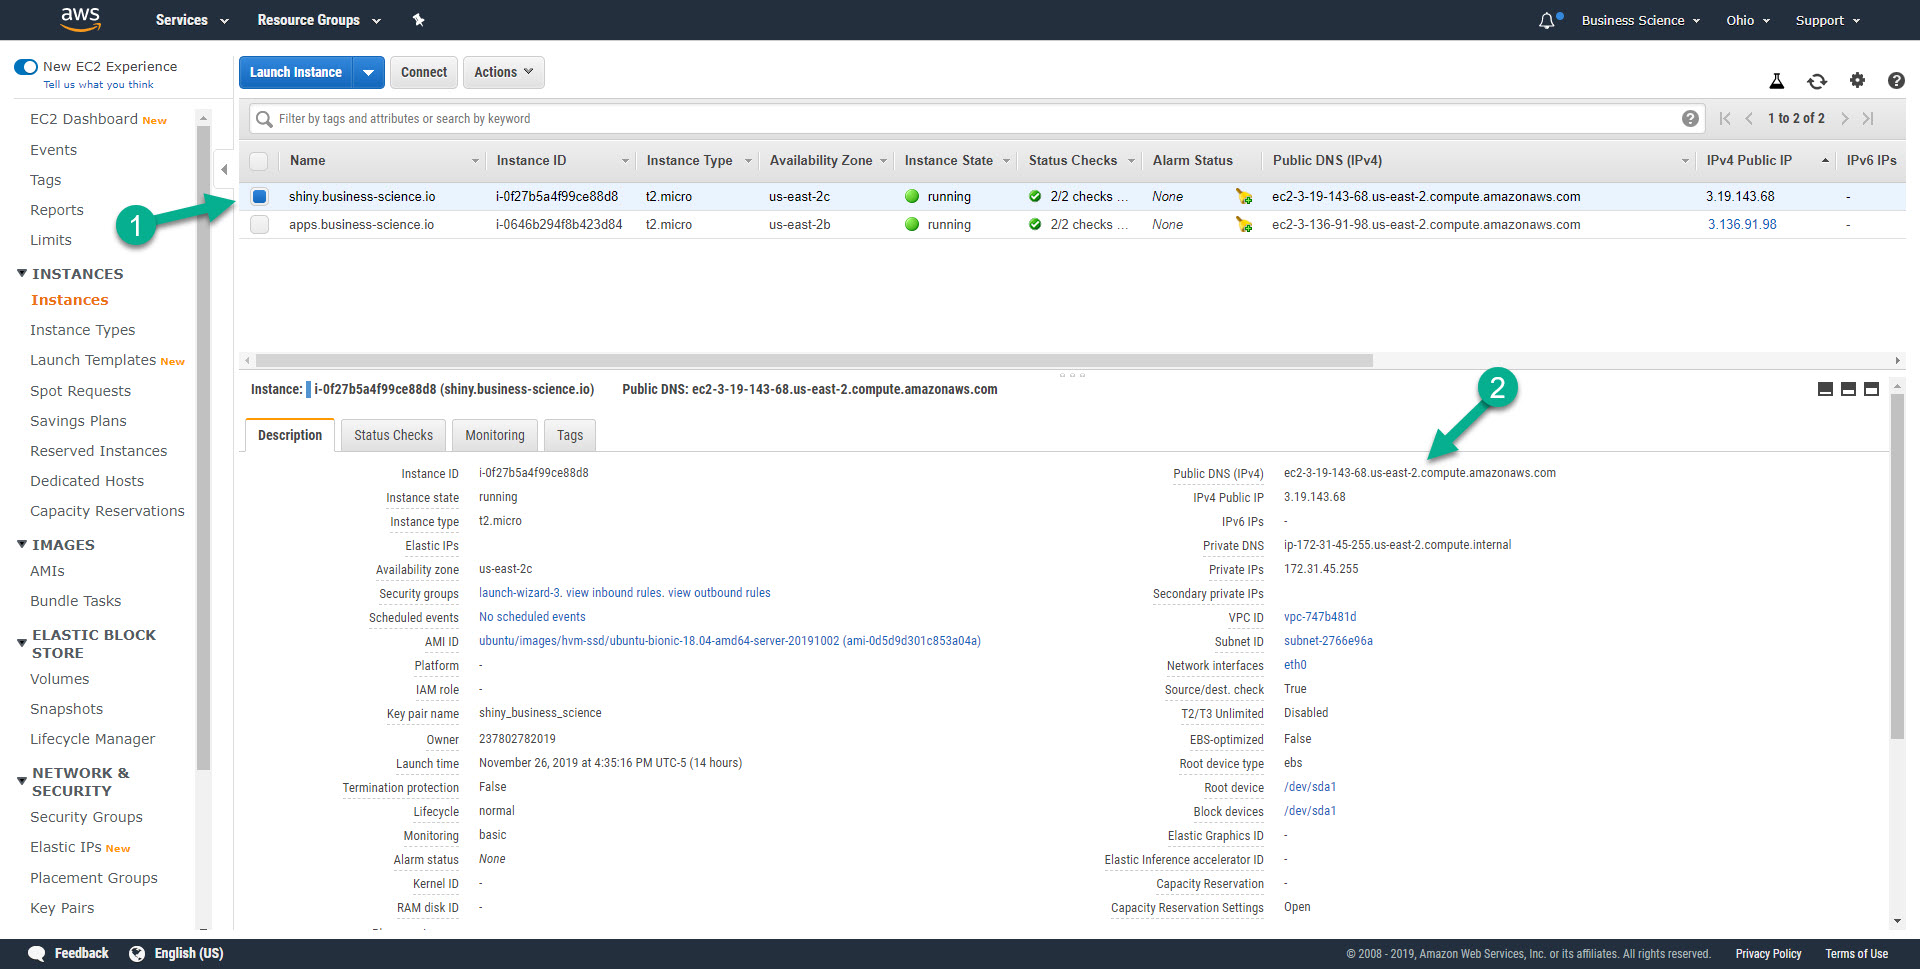
If using an Ubuntu AMI, Add your user “ubuntu@[INSERT PUBLIC DNS OF EC2 SERVER]”.
You can find your Public DNS for your EC2 Server here.
5.1.3.2 Part 2 - Setup the path to your .ppk file
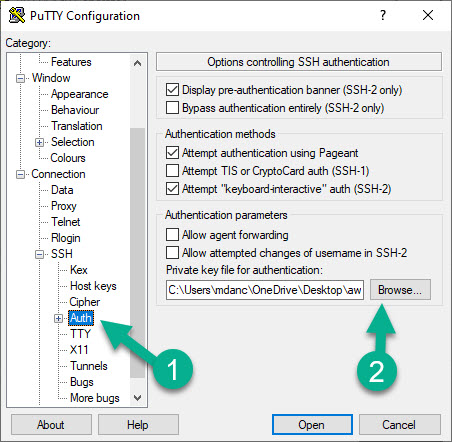
Under Connection > SSH > Auth, add the location of your .ppk file.
5.1.3.3 Part 3 (Optional) - Save these settings in Putty
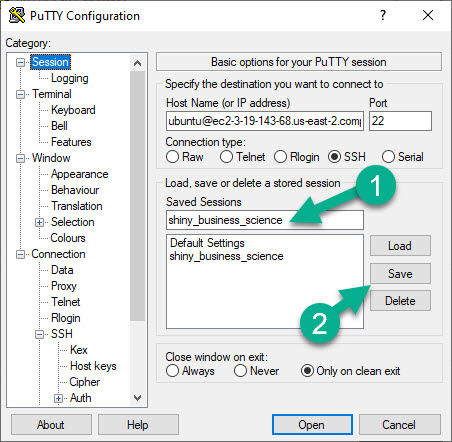
- Under Session, save your settings so you can easily connect next time.
- Pro Tip - I also adjusted the “Appearance” to change the font, font face, and font size
5.1.4 Step 4 - Connect to CLI
The Command Line Interface (CLI) to the AWS Ubuntu Server should now open.

5.2 Mac / Linux - Terminal
5.2.1 SSH into EC2
Mac & Linux are much easier to set up. Just use the terminal in either RStudio or Terminal App on Mac.
Navigate in your Terminal to the location of your AWS .pem file. Use cd ./Desktop/aws_key.
Run: chmod 400 your_pem_file.pem

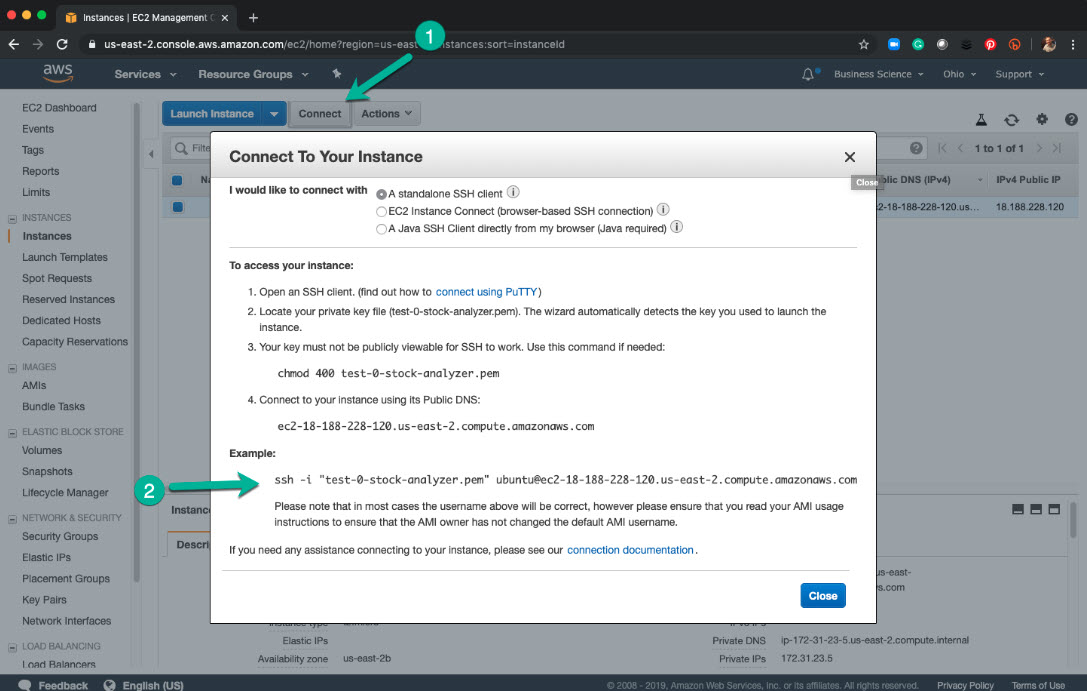
Use the SSH script from the EC2 “Connect” Popup Instructions.
5.2.2 (Optional) Add Key (.pem) File to SSH List
You can store your AWS EC2 Key .pem location using ssh-add -K <path-to>/your_key.pem. Then, subsequent reconnects will not need the -i flag.
5.2.3 Create a .ppk file (used later with FileZilla)
Sometimes you will need to convert a .pem file to a .ppk file.
- Install
puttyvia Terminal:brew install putty- If you don’t have Homebrew installed visit: https://brew.sh/
- Navigate to your key directory in your Terminal using
cd. - Run:
puttygen mykey.pem -o mykey.ppk- Swap the “mykey” file names for your file names


Have a question? Leave a comment.