Chapter 21 Database Connection
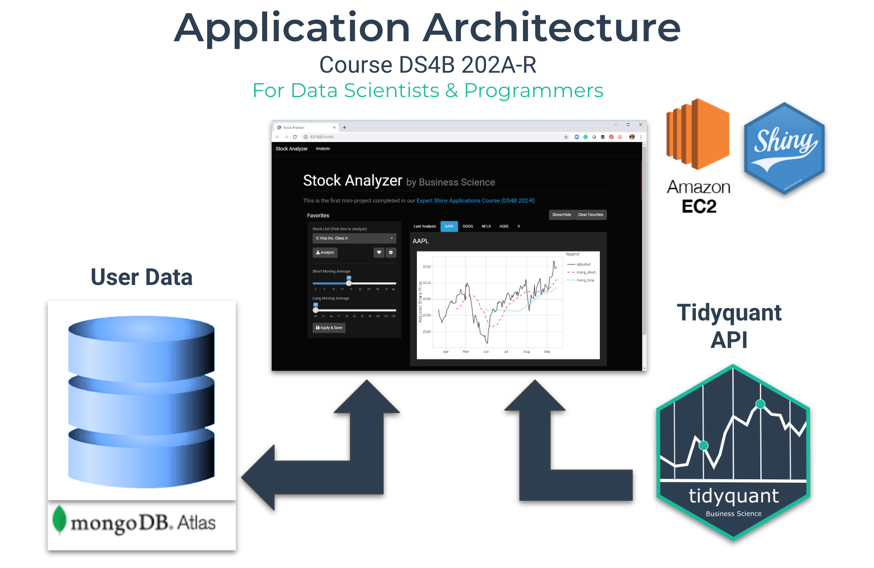
The goal in this section is to open the connection between your Stock Analyzer application and the “user data” storage. We will focus on two configurations:
- Local Storage (Architecture Not Shown) - Using an
RDSfile to store the user data for your Stock Analyzer application - MongoDB Atlas Cloud Storage (Architecture Shown) - Using the MongoDB Atlas cloud database to store the user data for your Stock Analyzer application
21.1 Prerequisites
You must have:
- EC2 Server with the 3
shinyapplications: Stock Analyzer (Local Data), Stock Analyzer (MongoDB Atlas), and Test App. This requirement will be satisfied if you’ve completed the GitHub Setup and Cloning Instructions in the previous chapters. - MongoDB Atlas database that the Stock Analyzer (MongoDB Atlas) connects to: This requirements will be satisfied if you’ve completed Part 3 of the Shiny Developer with AWS course.
Use the following command to run the 3 apps in detached mode:
21.2 Local Storage
Local storage is local to your application. An example is RDS file that is setup for the Stock Analyzer (Local Data). In this section, we will open the permissions of the user_base_tbl.rds file to permit the Stock Analyzer App to read/write to the file.
- We need to locate the
user_base_tbl.rdsfile that contains our user data inside the application to adjust permissions.

Adjust the user data file to read/write access by using
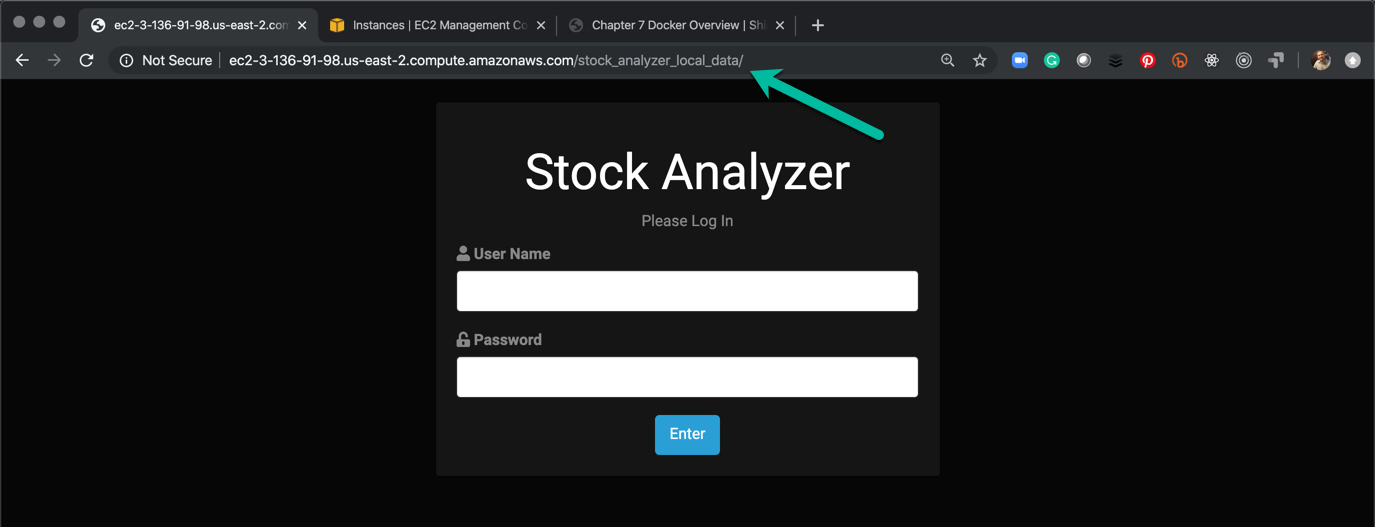
chmod 777 [FILE]. Verify the file permissions have been changed withls -lh.Navigate to the URL corresponding to the application, and it will work.
21.3 MongoDB Atlas Cloud & Elastic IP
Next, we’ll connect the Stock Analyzer (MongoDB Atlas) application with the MongoDB Atlas Cloud Database. The architecture is shown below. The database is outside of the application and AWS so we will need to set permissions inside of MongoDB Atlas to allow the EC2 Instance to connect to the MongoDB Atlas database. This process is similar to how we “Whitelisted” our Local IP address when developing the Stock Analyzer on our local computer.
MongoDB Atlas Website: https://www.mongodb.com/cloud/atlas

21.3.1 Verify Configuration File and App are Setup
Use cat to check that the app.R file is set to “production” and the config.yml file has the correct settings.

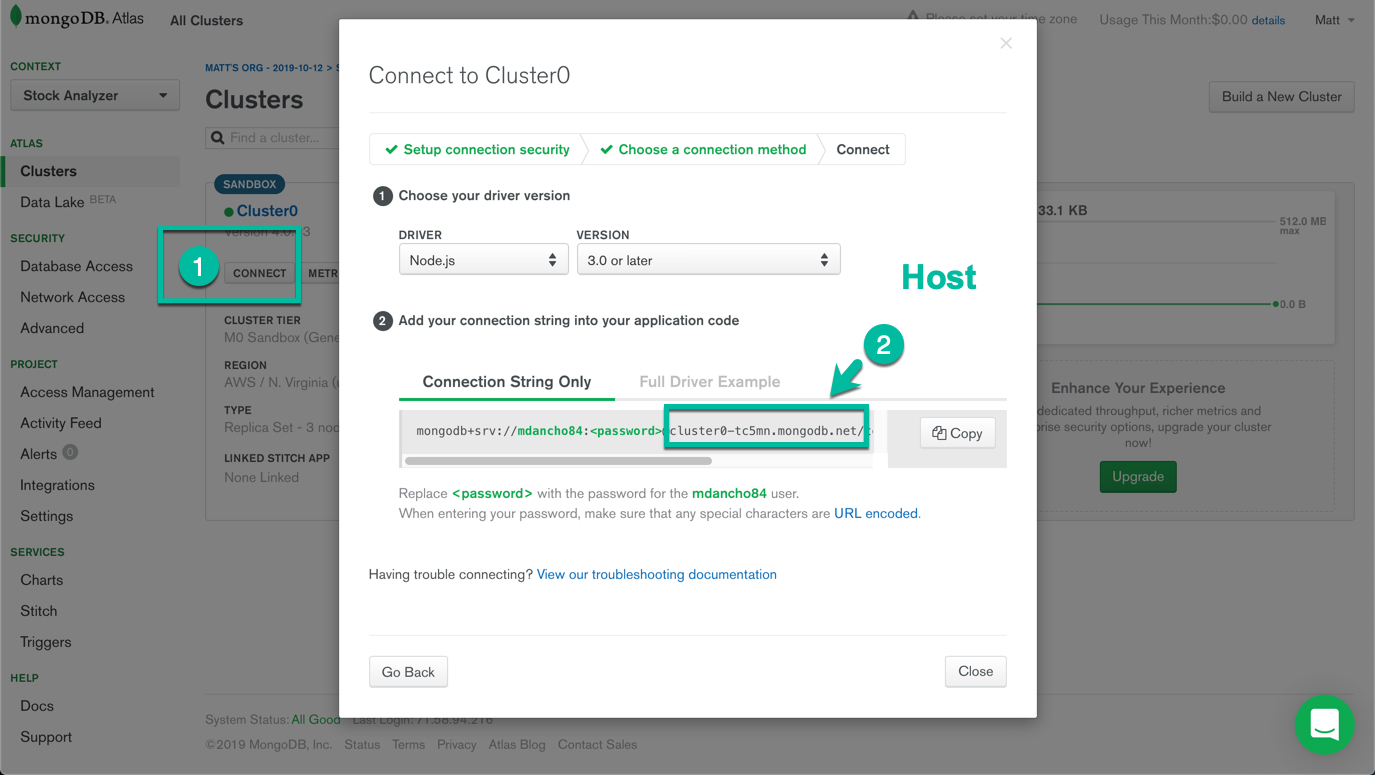
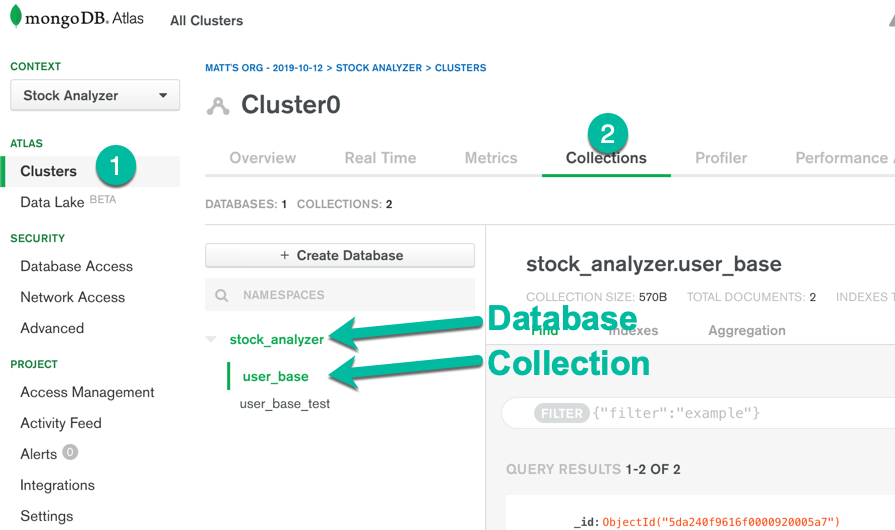
The config.yml parameters must correspond to the correct MongoDB Database connection string, database and collection.
production:
    host:       "cluster0-tc5mn.mongodb.net"
    username:   "YOUR_USERNAME"
    password:   "YOUR_PASSWORD"
    database:   "stock_analyzer"
    collection: "user_base"
Verify the host.
Verify the database and collection.
21.3.2 AWS Elastic IP Address (Recommended)
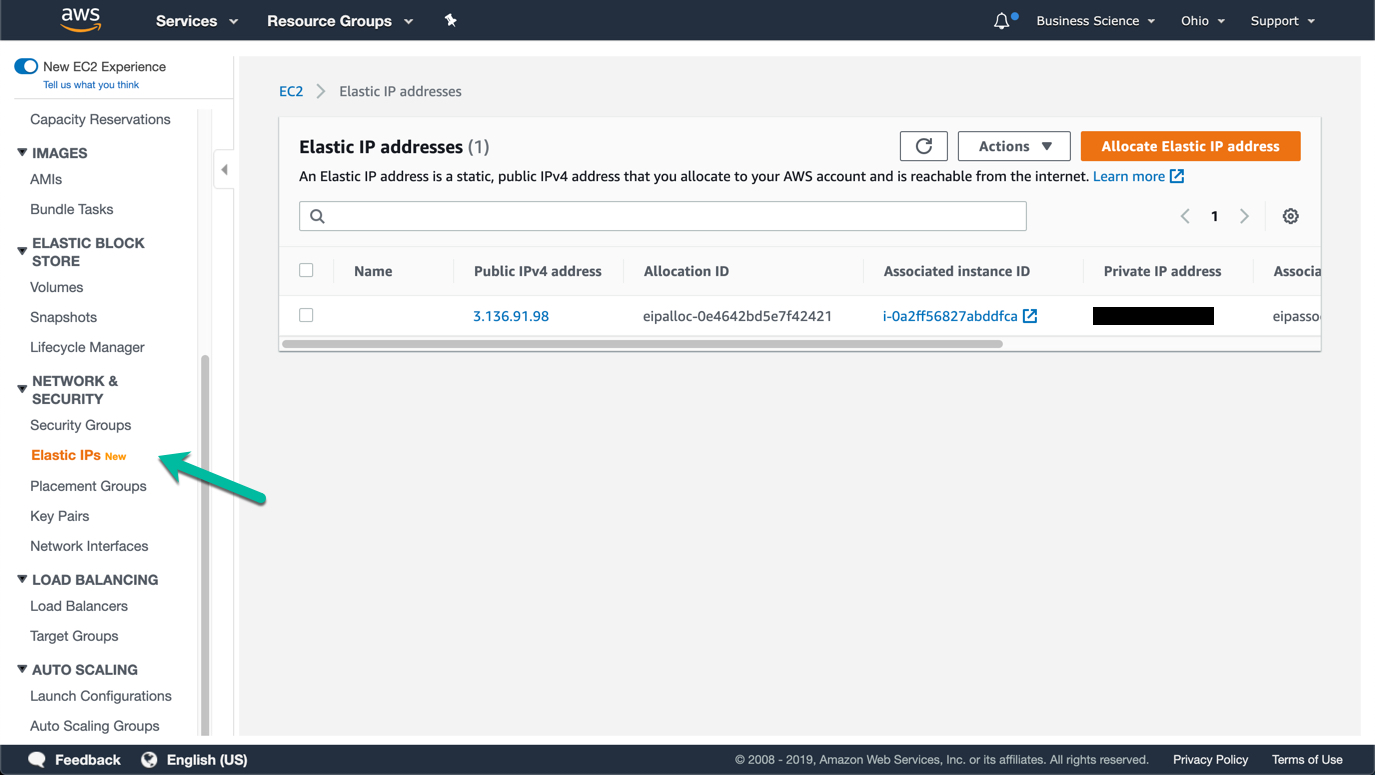
It’s a good idea to add an Elastic IP Address. This will permit resuing the IP Address. This way if anything ever happens to your EC2 Instance, you can create a new instance and apply the Elastic IP. Apply the Elastic IP to your EC2 Instance.
21.3.3 Whitelist EC2 Server inside of MongoDB Atlas
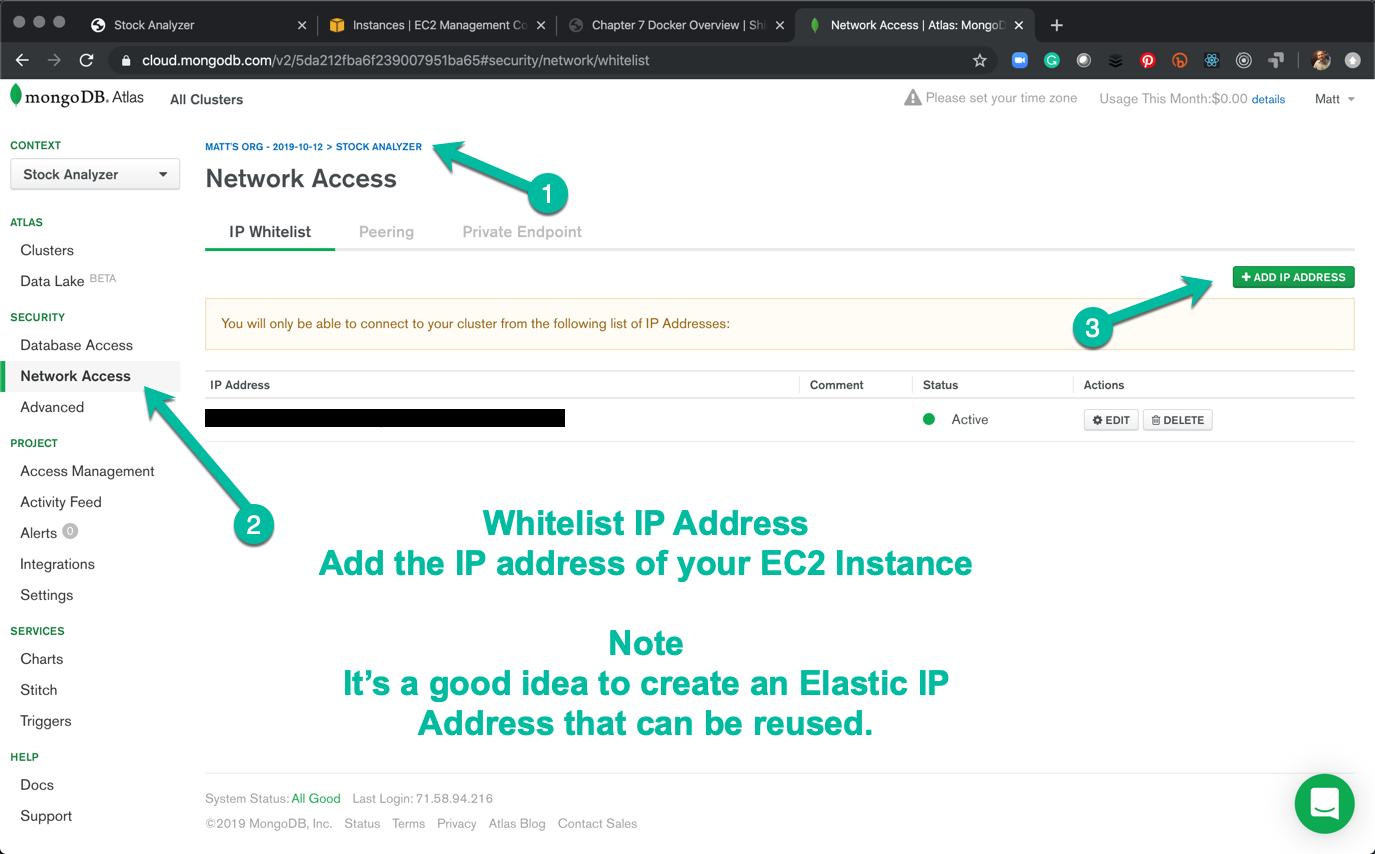
Navigate to the MongoDB Atlas (https://www.mongodb.com/). Inside the cluster that has been created, we can add the EC2 Server’s IP Address.
Elastic IP Address - It’s a good idea to use the Elastic IP address. If your server ever has an irrecoverable issue, you can quickly set up a new EC2 Instance and apply the Elastic IP Address.
21.3.4 Verify MongoDB Atlas Connection Works
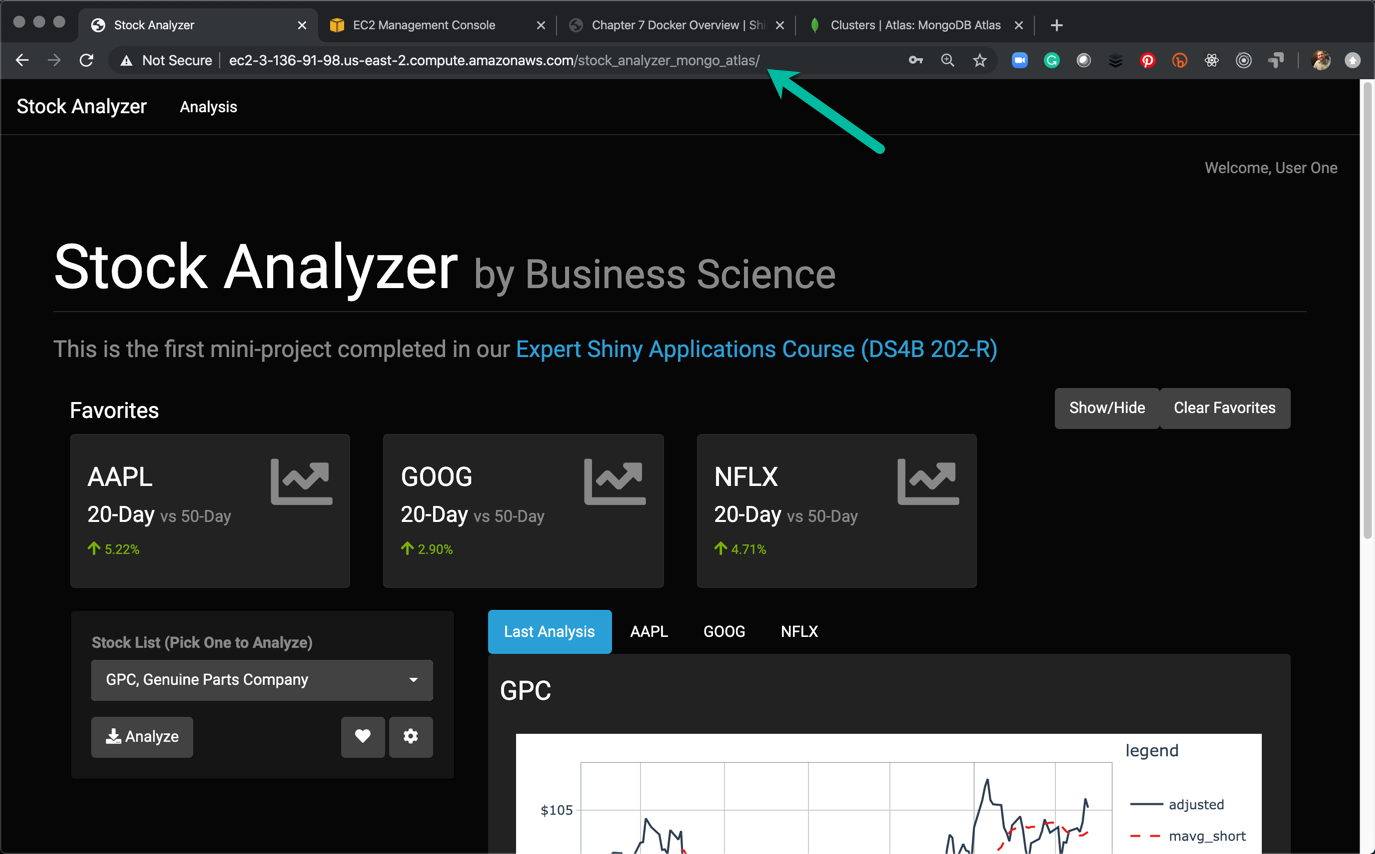
Navigate to your EC2 Server address for the stock analyzer mongo atlas directory.
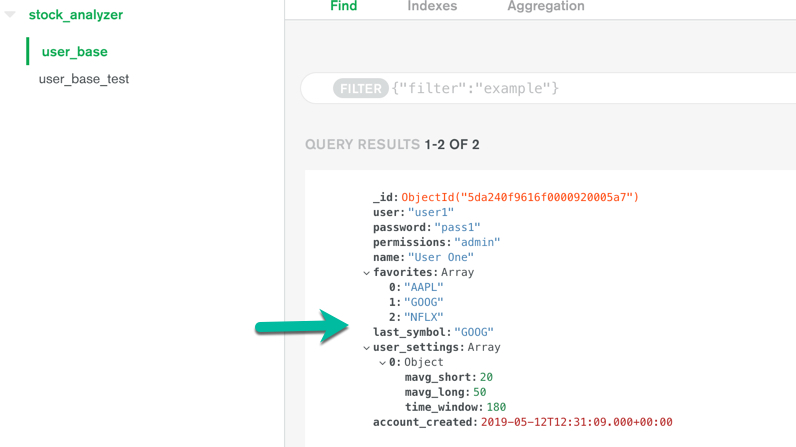
Verify that any updates are propagated to the MongoDB Atlas Cloud database.
21.4 Wrapup
Congratulations! You’ve successfully connected Stock Analyzer applications to (1) a local RDS file for storage, and (2) the MongoDB Atlas Cloud Database for storage.


Have a question? Leave a comment.