
Chapter 3 AWS EC2 Server Setup
This document covers setting up a single EC2 Instance on AWS.
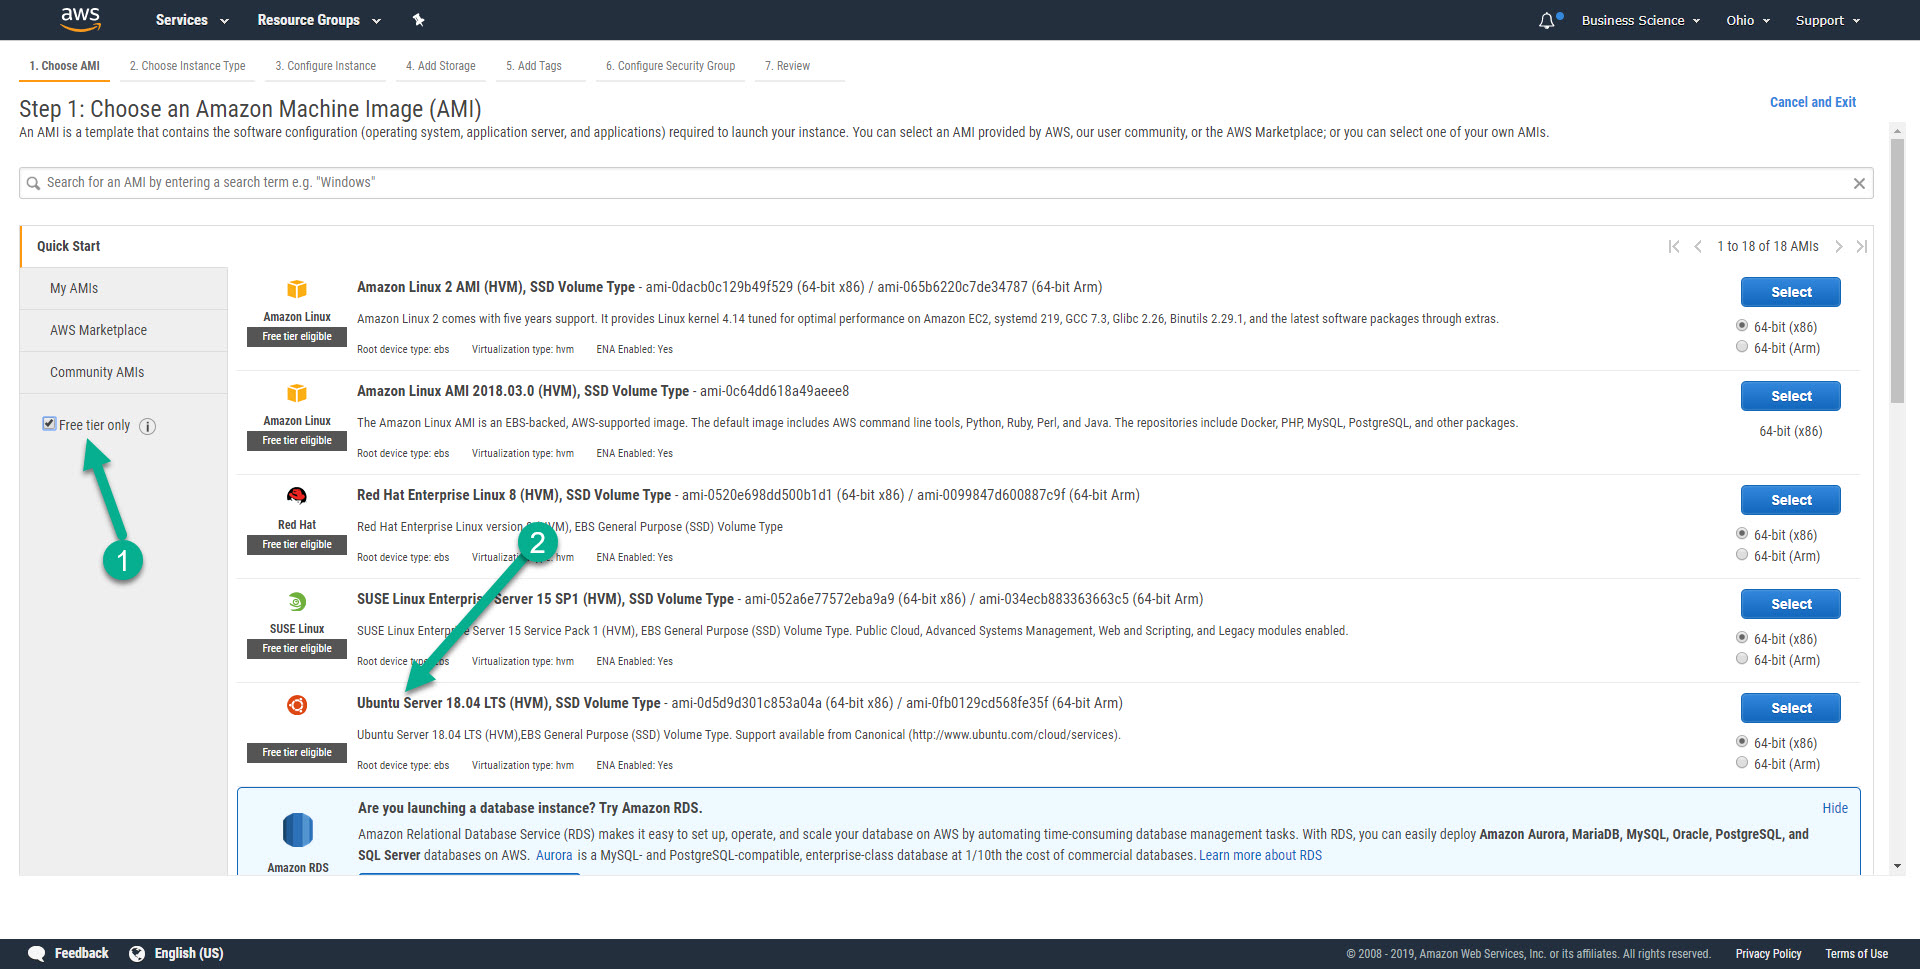
3.1 Step 1 - Select AMI
Pick an Amazon Machine Image (AMI) that suits your needs. In the course, we will select “Free Tier Eligible”, which is a t2.micro that comes with 1 CPU and 1GB RAM.
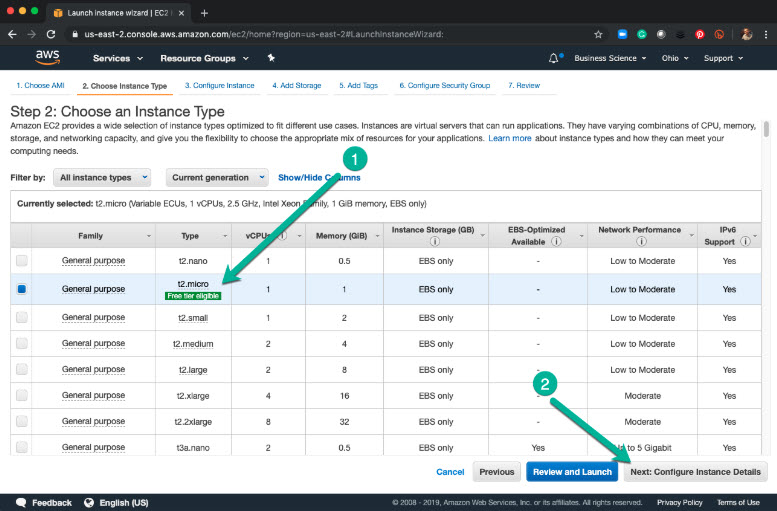
3.2 Step 2 - Select the Instance Type (CPU & RAM)
We are going with Free Tier Eligible, which has 1 CPU & 1GB RAM.
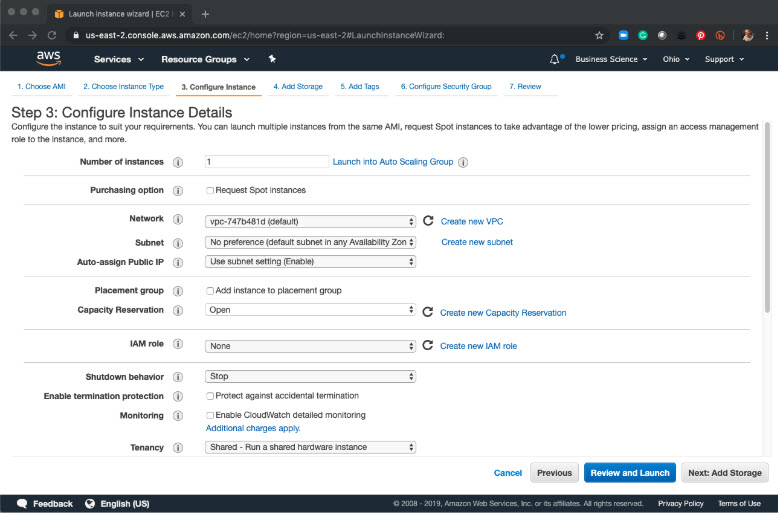
3.3 Step 3 - Configure Instance
Leave these settings as-is. We can always address Networking later via VPC, Subnet, Routing, and more.
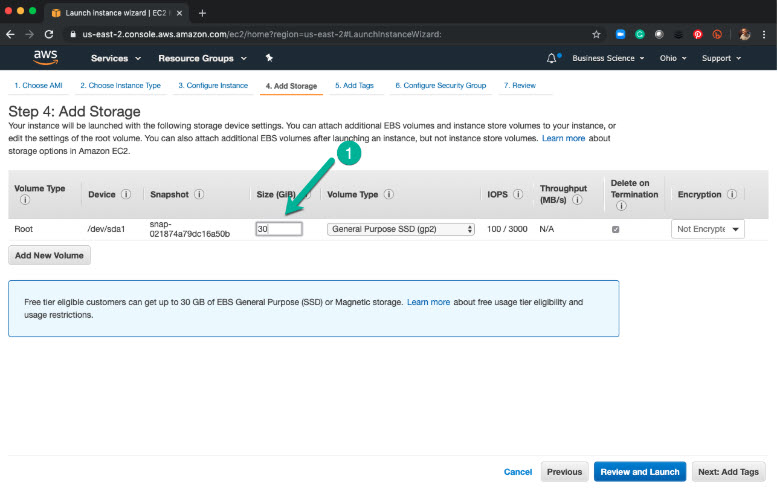
3.4 Step 4 - Add Storage
Increase to 30 GB of storage. This is the maximum within the “Free Tier”.
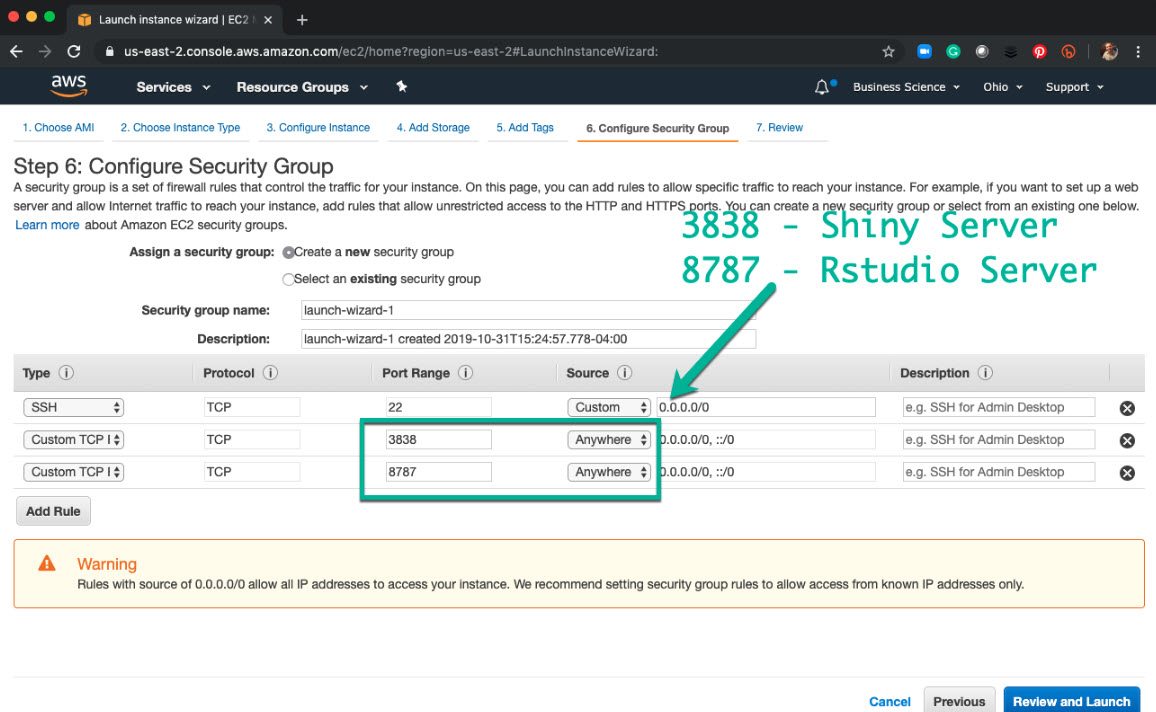
3.6 Step 6 - Configure Security Group
Add a new security group with the following ports open:
- 3838: Shiny Server
- 8787: RStudio Server
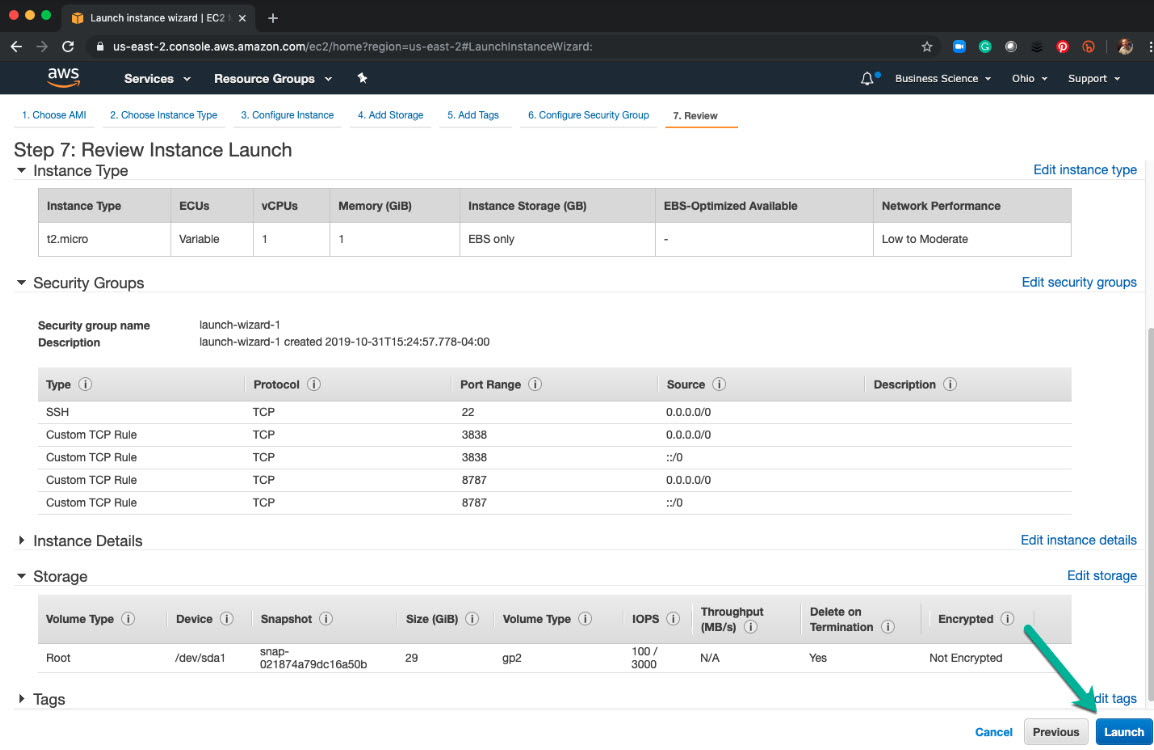
3.7 Step 7 - Review & Launch
Double-check your settings. If happy, click launch.
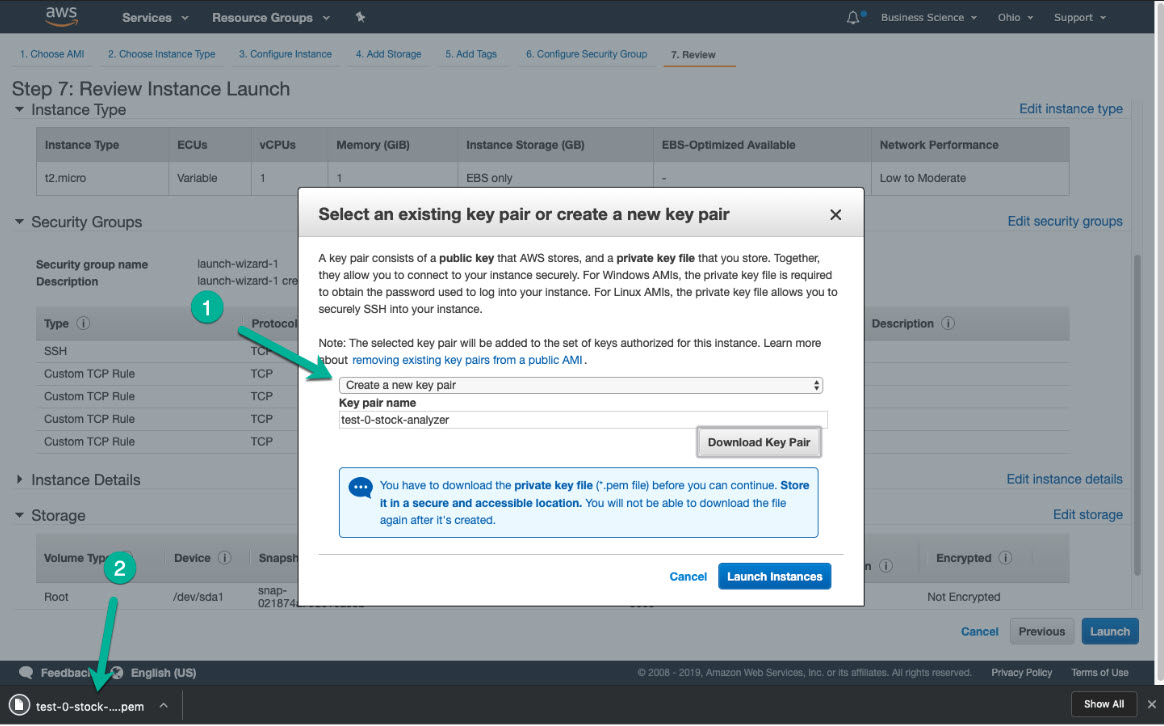
3.8 Step 8 - Key Pair
If your first key-pair, you will need to create. Moving forward, you can re-use keys.
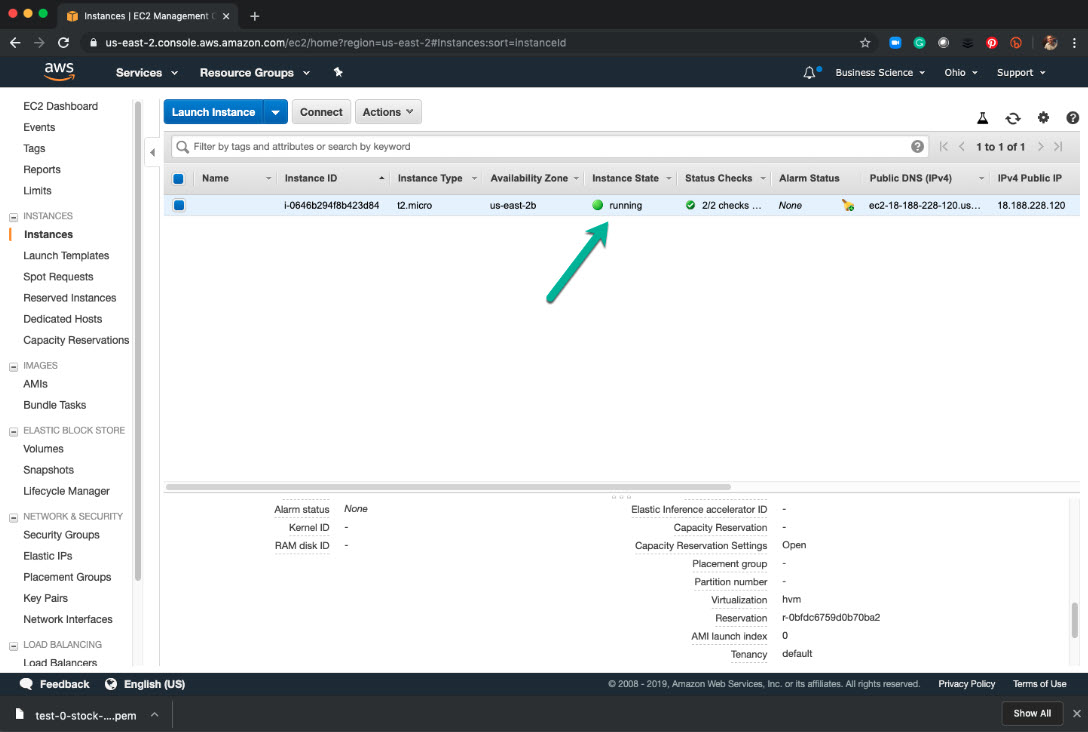
3.9 Step 9 - Instance
It will take about 5-10 minutes to launch your instance.
Become a Expert Shiny Developer with AWS
Have a question? Leave a comment.