Chapter 18 Managing App Changes
This document covers how to manage application changes. By the end of the chapter, you will be familiar with making changes via:
- A simple method - Designed for smaller changes on non-mission critical projects
- A complex method via
branches- Designed for teams, deployment, and massive changes to mission critical projects.
18.1 Prerequisites
You must have:
- Local Repository with the 3 Apps
- Remote Repository with the 3 Apps
- EC2 Server with the 3 Apps
All repositories must be linked via git. This requirement will be satisfied if you have followd the GitHub Setup and Cloning Instructions in the previous chapters.
18.2 Simple App Changes (Development)
In development, application changes can often be done without creating a separate branch because you haven’t deployed yet and your ability rollback and revert from application changes is less likely to cause a major issue. With that said, this depends on the complexity of the application an number of data scientists working on it.
18.2.1 Change Request
Suppose the organization requires us to update applications to the Bootstrap Cyborg Theme. The app is not in production, and we can easily accomodate this request by making a simple change to our Test Application by adding the code:
18.2.2 Make the Change on the master Branch
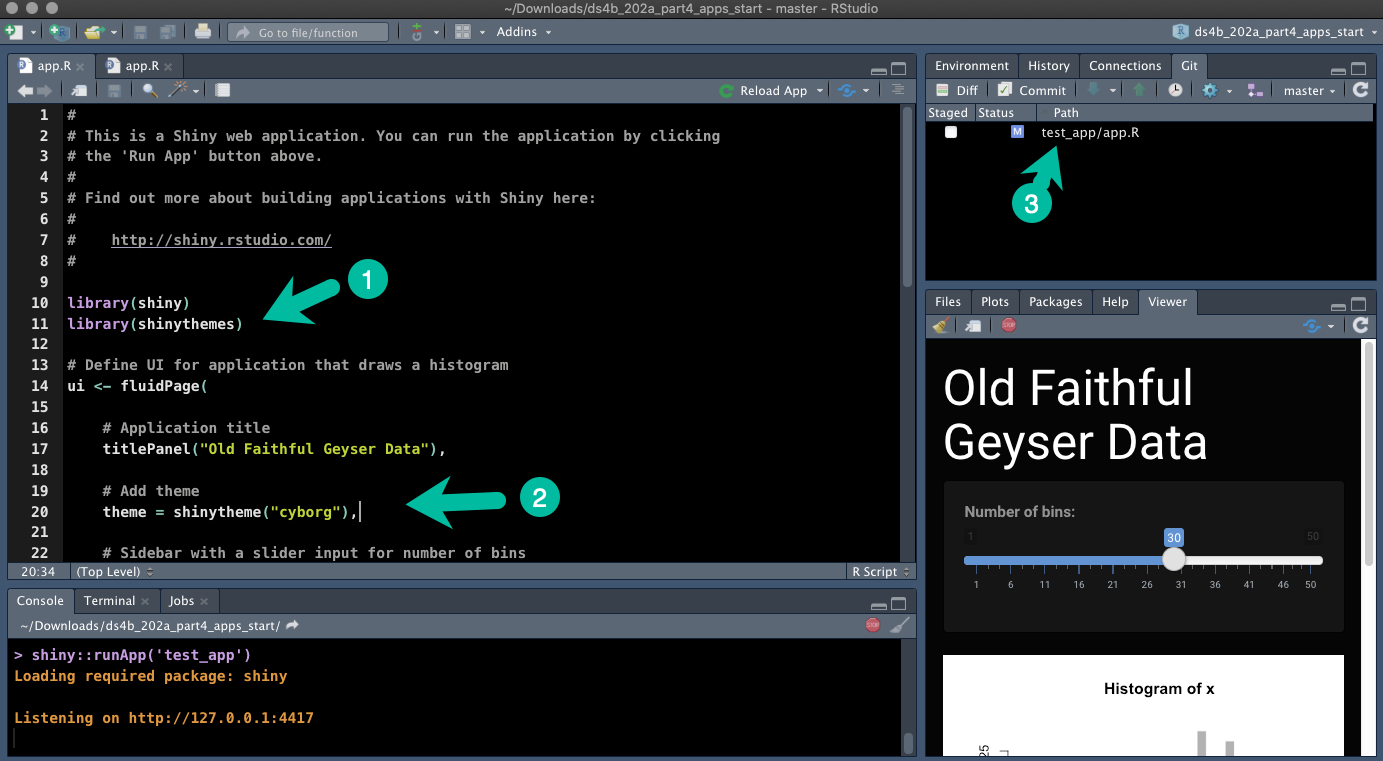
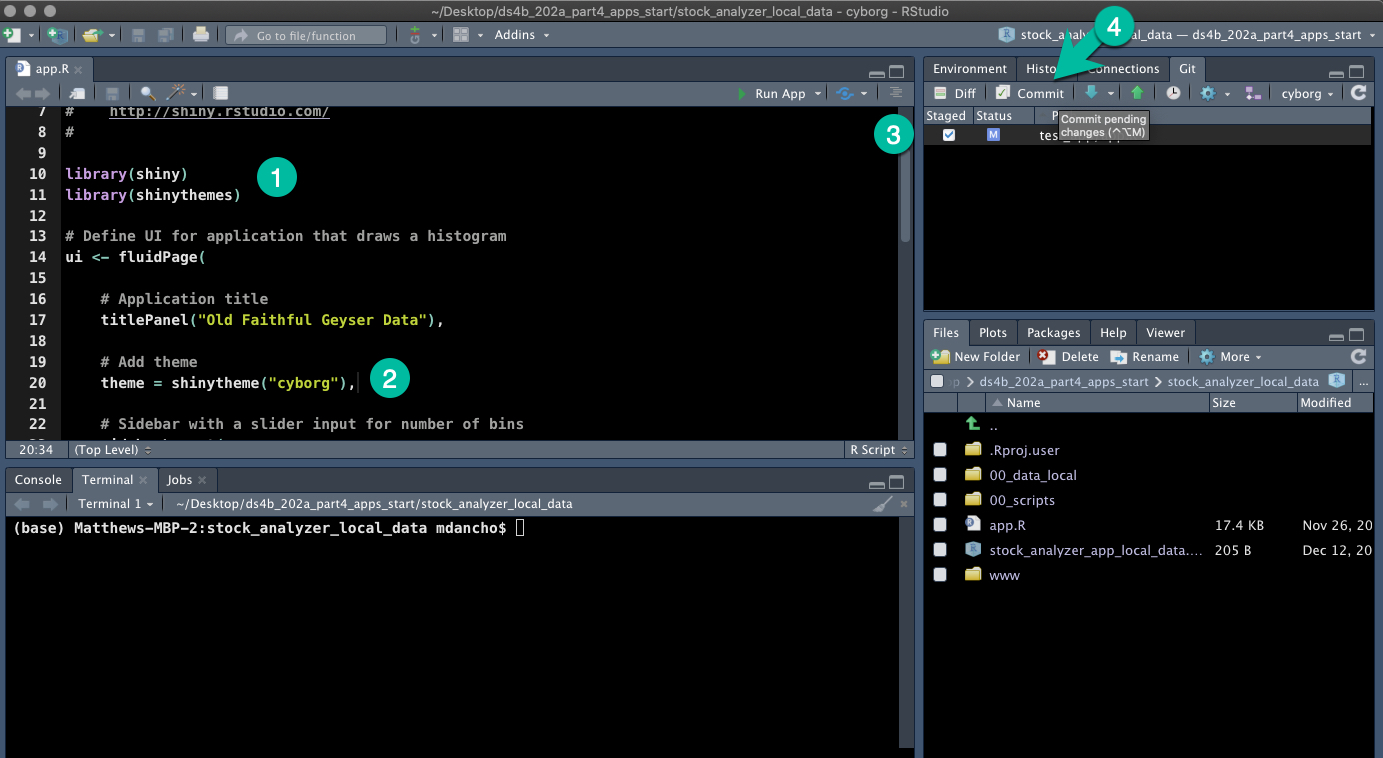
18.2.2.1 Step 1 - We make the change to the app.R file
- We add
library(shinythemes) - We add
theme = shinytheme("cyborg") - We see that a change notification appears in the “Git Pane”
18.2.2.2 Step 2 - We investigate the changes and commit to local repository
- Commit the change
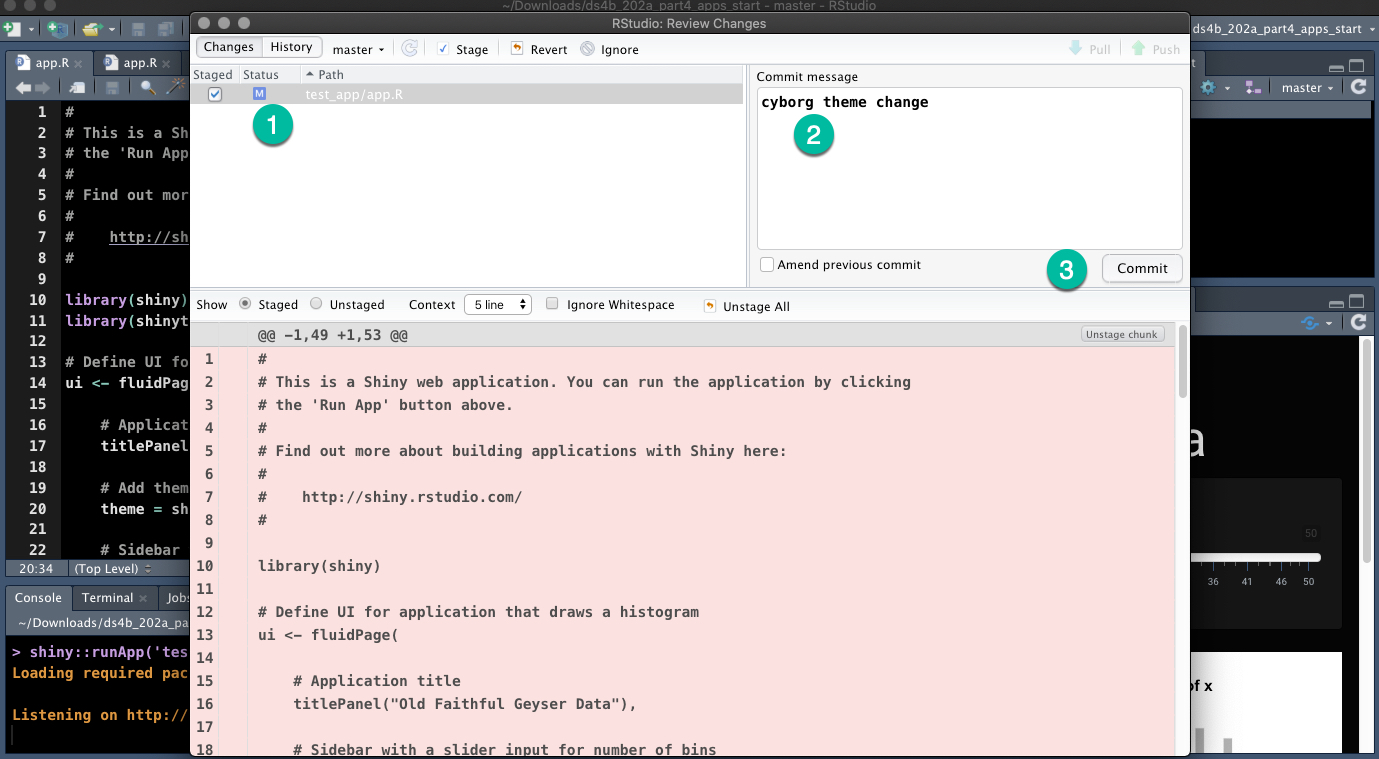
. Push the change to the master
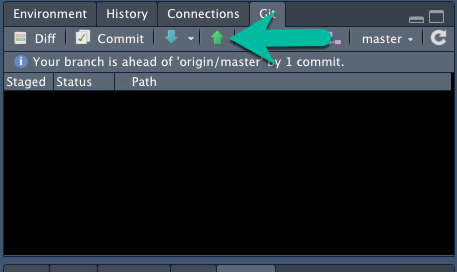
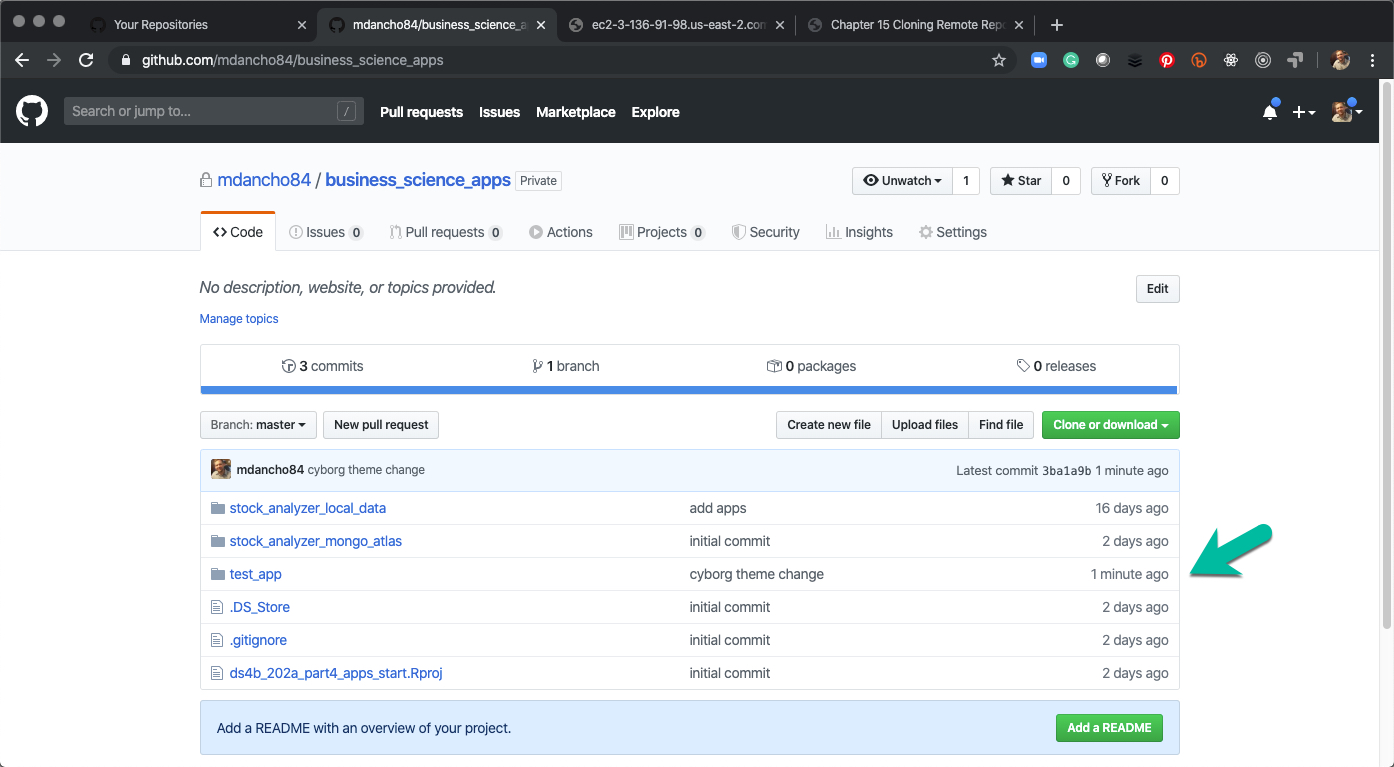
18.2.2.3 Step 3 - Check the Remote Repository
Verify the change has been pushed to the remote.
18.2.2.4 Step 4 - EC2 Server, Pull the Change
cdinto your cloned app directorygit pullthe Cyborg them app changes
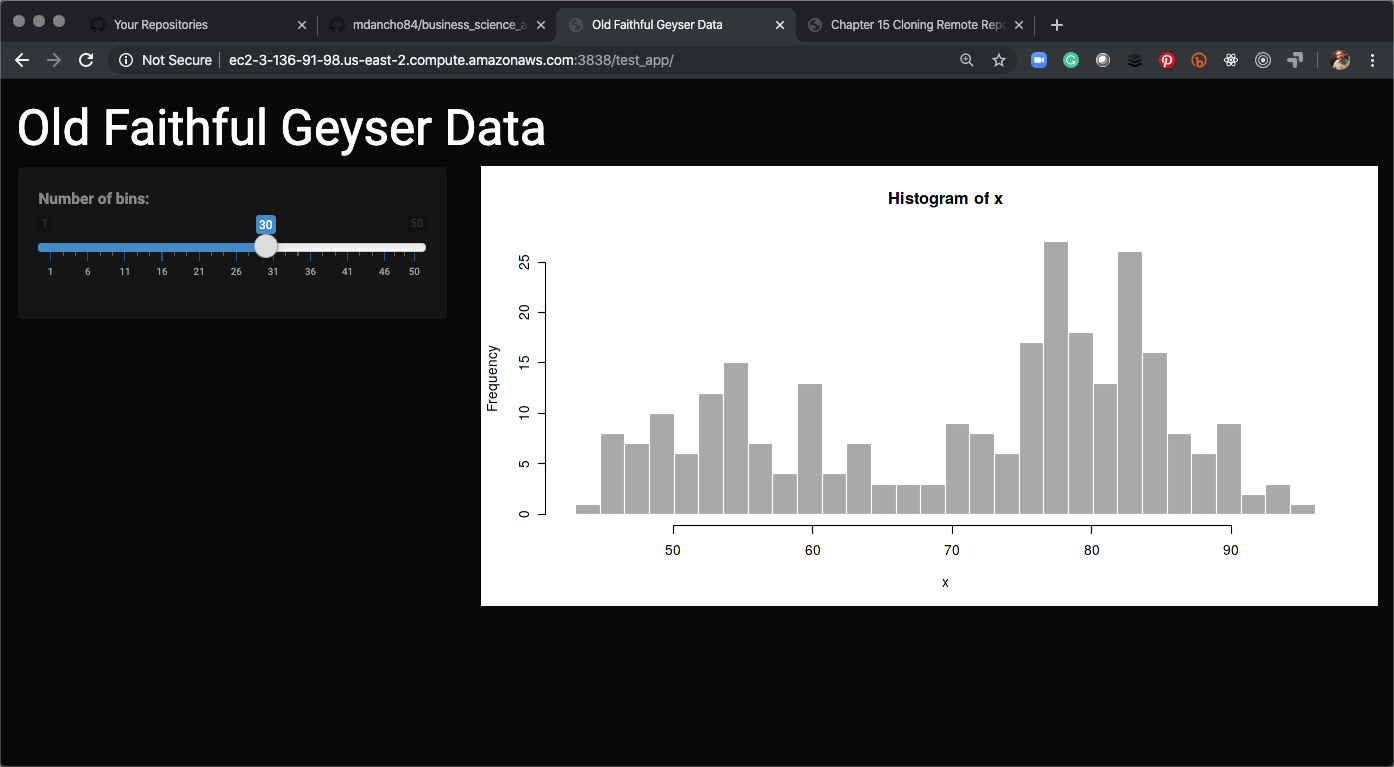
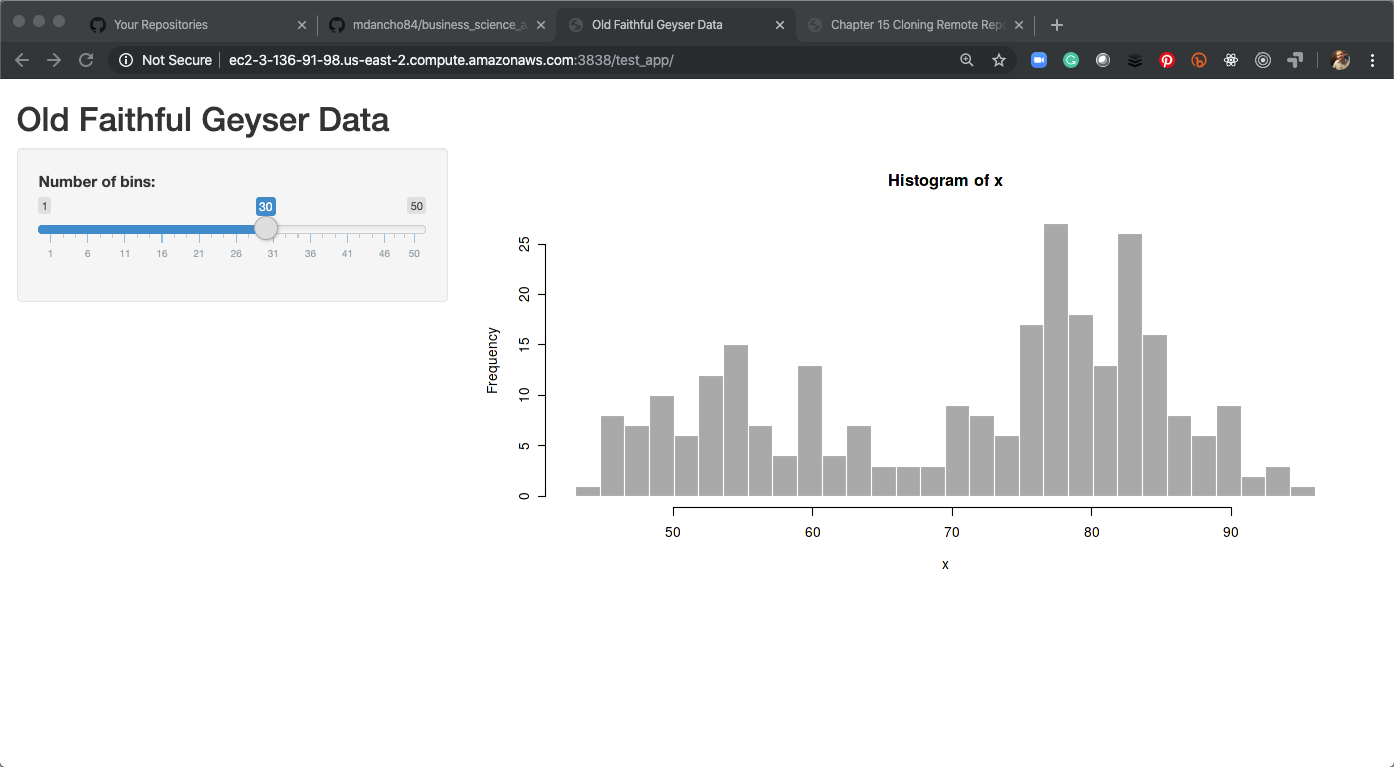
18.2.2.5 Step 5 - EC2 Server, Test the App
Run the following command (modify as necessary to fit your ubuntu directory setup):
sudo docker container run --rm  -p 3838:3838 \
-v /home/ubuntu/business_science_apps/test_app/:/srv/shiny-server/test_app \
-v /home/ubuntu/log/shiny-server/:/var/log/shiny-server/ \
mdancho/shinyauth
Verify the app change by navigating to your Public EC2 Server URL with :3838/test_app appended to the URL.
18.2.3 Reverting the Change
Your organization decides that it was OK to have the default shiny theme. We can quickly adjust. Using git reset --hard on our local repo and pushing the changes following Steps 2-5 above.
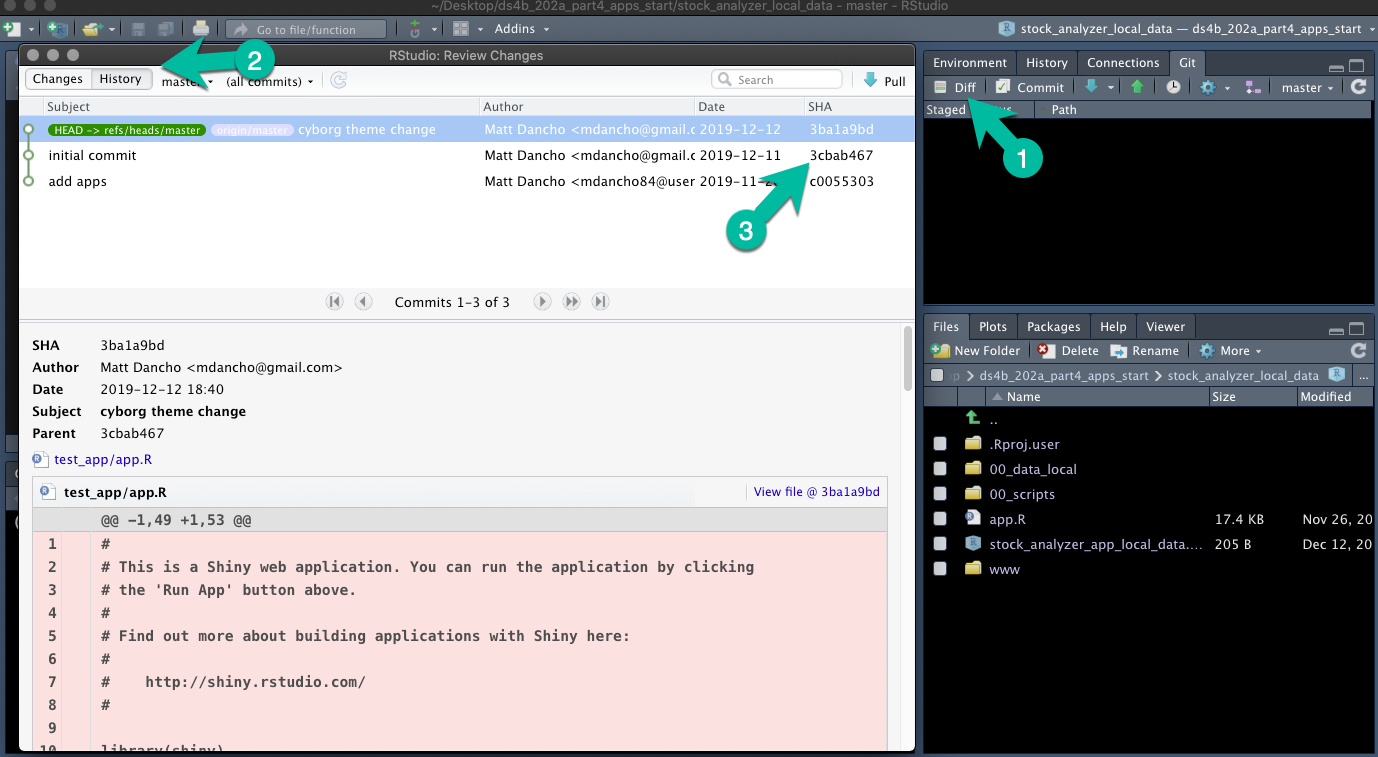
18.2.3.1 Step 1 - Inspect the Commit History
Inspect the commit history:
- Click “Diff” in the “Git Pane”. This shows the file differences.
- Select the “History” tab. This tells us information about all of our commits.
- Find the SHA (unique identifier) that we want to revert to.
I can see that I have 3 commits. I need to revert SHA 3ba1a9bd to 3cbab467.
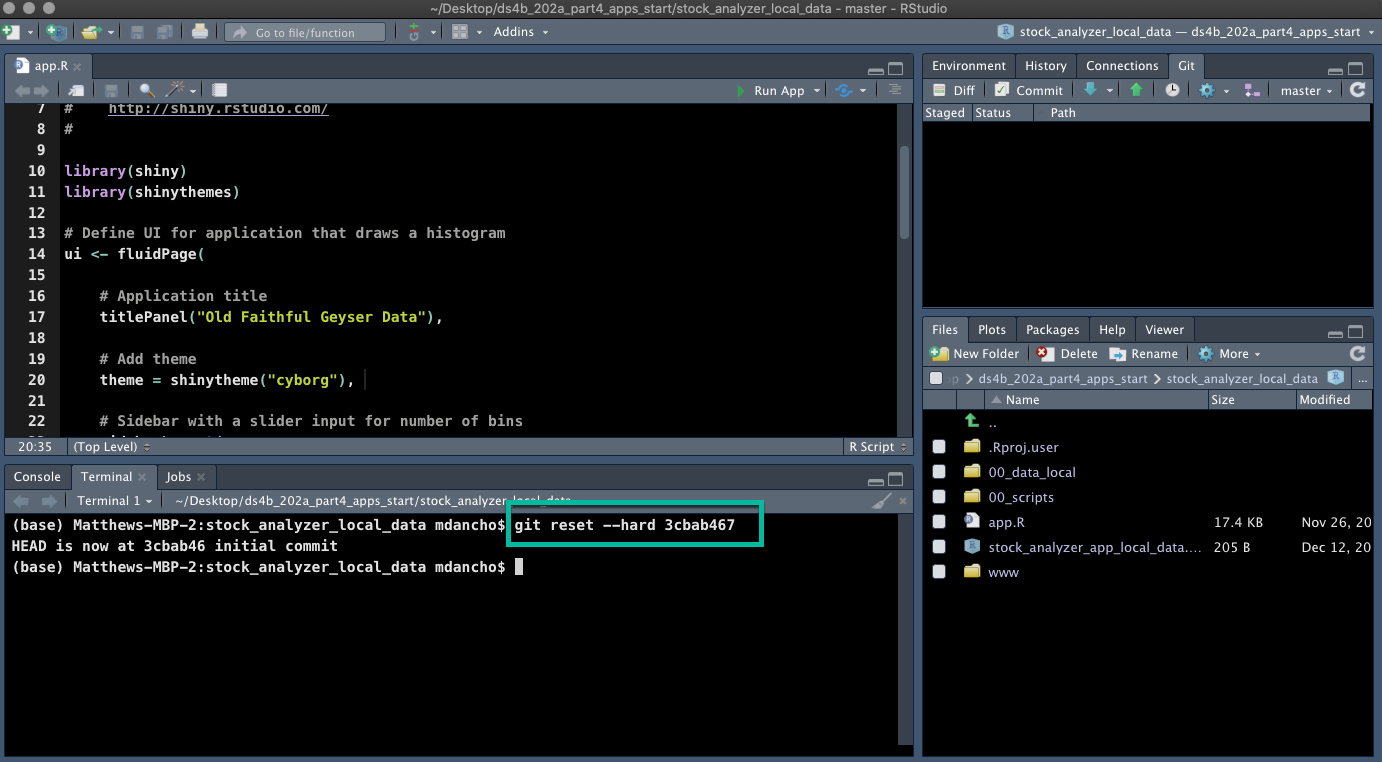
18.2.3.2 Step 2 - Reset Hard
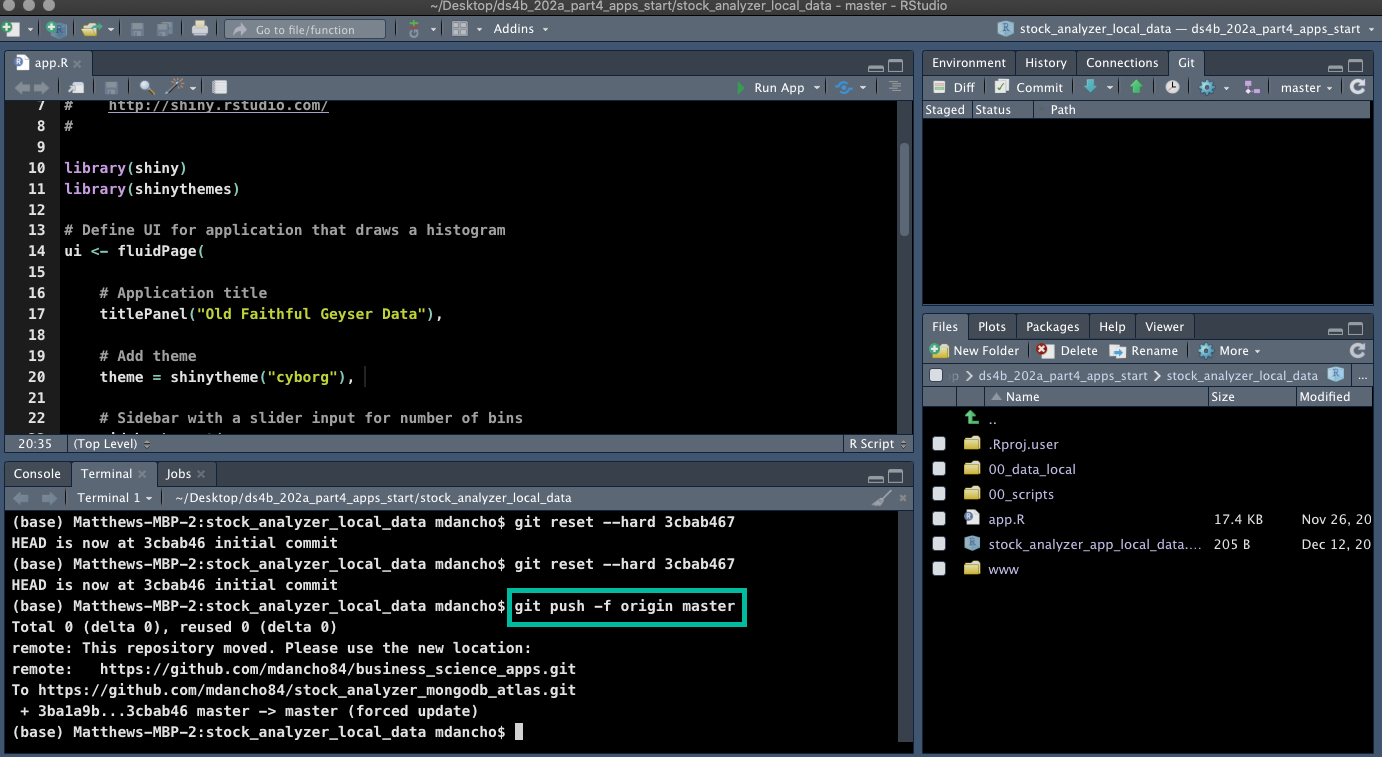
Next, use git reset --hard [SHA] for the the “Initial Commit”. This reverts the changes made in the “Cyborg theme change”.
18.2.3.3 Step 3 - Push to Remote
Use git push -f origin master to update the Remote.
18.2.3.4 Step 4 - Pull to EC2 Server
Update the EC2 Server:
git fetch origin- Gets the commit history from the Remotegit reset --hard origin/master- Resets the files to the Remote (notice commit SHA is now at 3cbab46)- Run the app in dev mode using:
sudo docker container run --rm  -p 3838:3838 \
-v /home/ubuntu/business_science_apps/test_app/:/srv/shiny-server/test_app \
-v /home/ubuntu/log/shiny-server/:/var/log/shiny-server/ \
mdancho/shinyauth
The app should be reverted to the original.
18.3 Complex App Changes (Production or Big Changes in Development)
When apps are in production, the stakes are much higher. Also, depending on the complexity of the changes and number of developers envolved, we may want to use branches to develop our changes without disturbing the master.
18.3.1 Change Request
Your organization now has the app in production, but wants to change the Bootstrap Theme to Cyborg.
Use this code to docker run the Test App to Detached mode (-d).
sudo docker container run -d  -p 3838:3838 \
-v /home/ubuntu/business_science_apps/test_app/:/srv/shiny-server/test_app \
-v /home/ubuntu/log/shiny-server/:/var/log/shiny-server/ \
mdancho/shinyauth
The Test App is now running.
18.3.2 Make Change on “cyborg” Branch
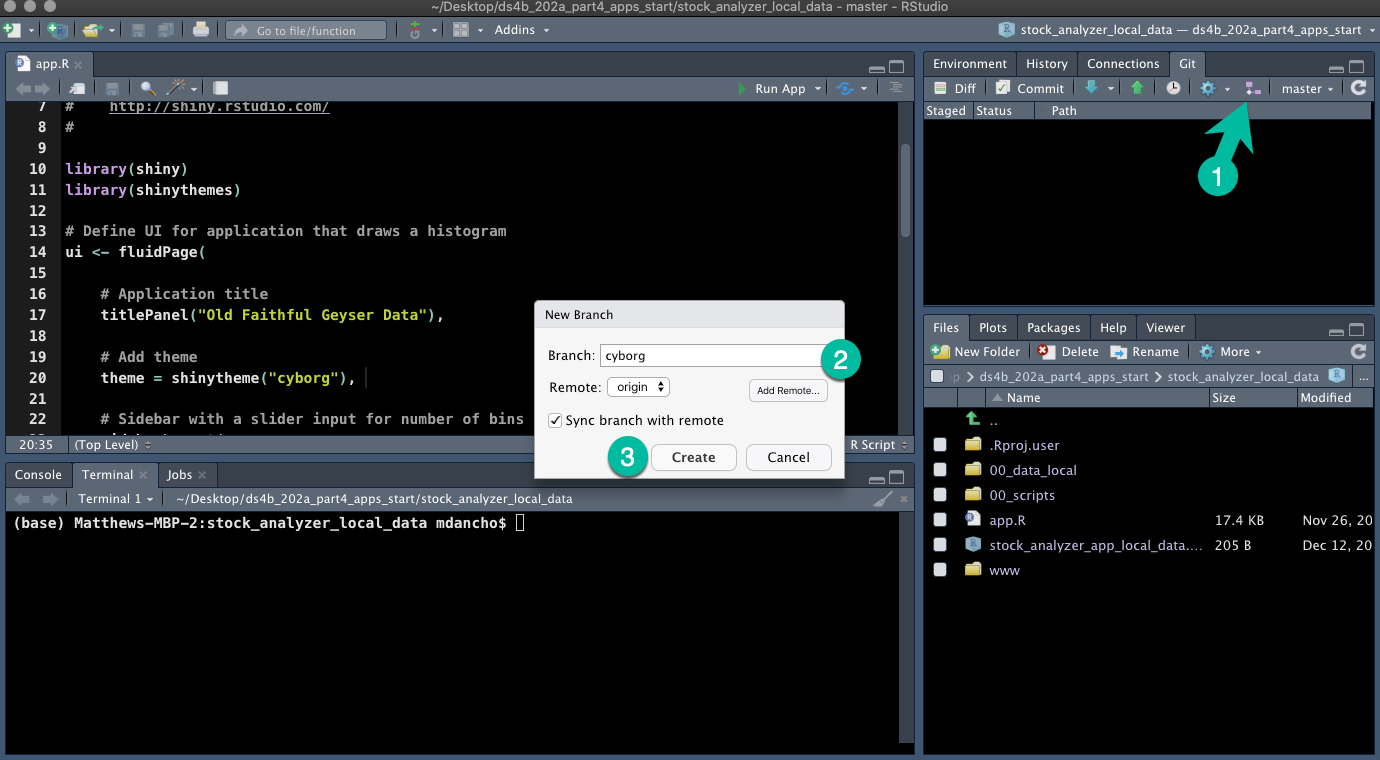
18.3.2.1 Step 1 - Create “cyborg” branch
- Click “New Branch” from the “Git Pane”
- Set the new branch to “cyborg”
- Click “Create”
18.3.2.2 Step 2 -Verify Local has cyborg Branch (Active)
We are now on the cyborg branch.
- The “Git Pane” shows “cyborg” as the branch name.
- The Remote has been updated to have both a master and cyborg branch.
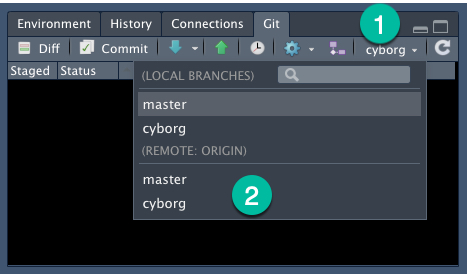
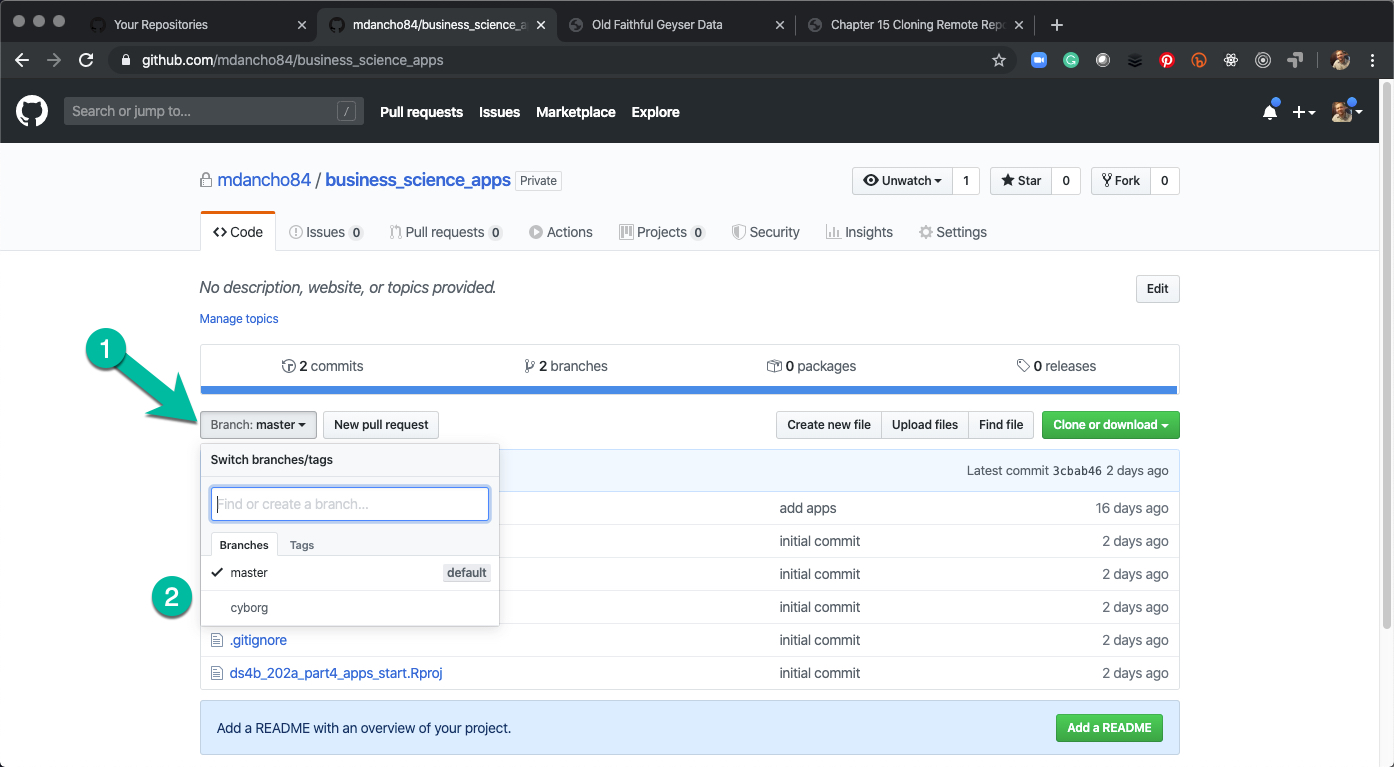
18.3.2.3 Step 3 - Verify Remote has cyborg Branch (Inactive)
- Pull dropdown on “Branch”
- See that cyborg is now available.
18.3.2.4 Step 4 - Make changes to cyborg Branch (Local)
- Add
library(shinythemes) - Add
theme = shinytheme("cyborg")and saveapp.R - Changes show up in git pane.
- Commit changes with “cyborg theme” message
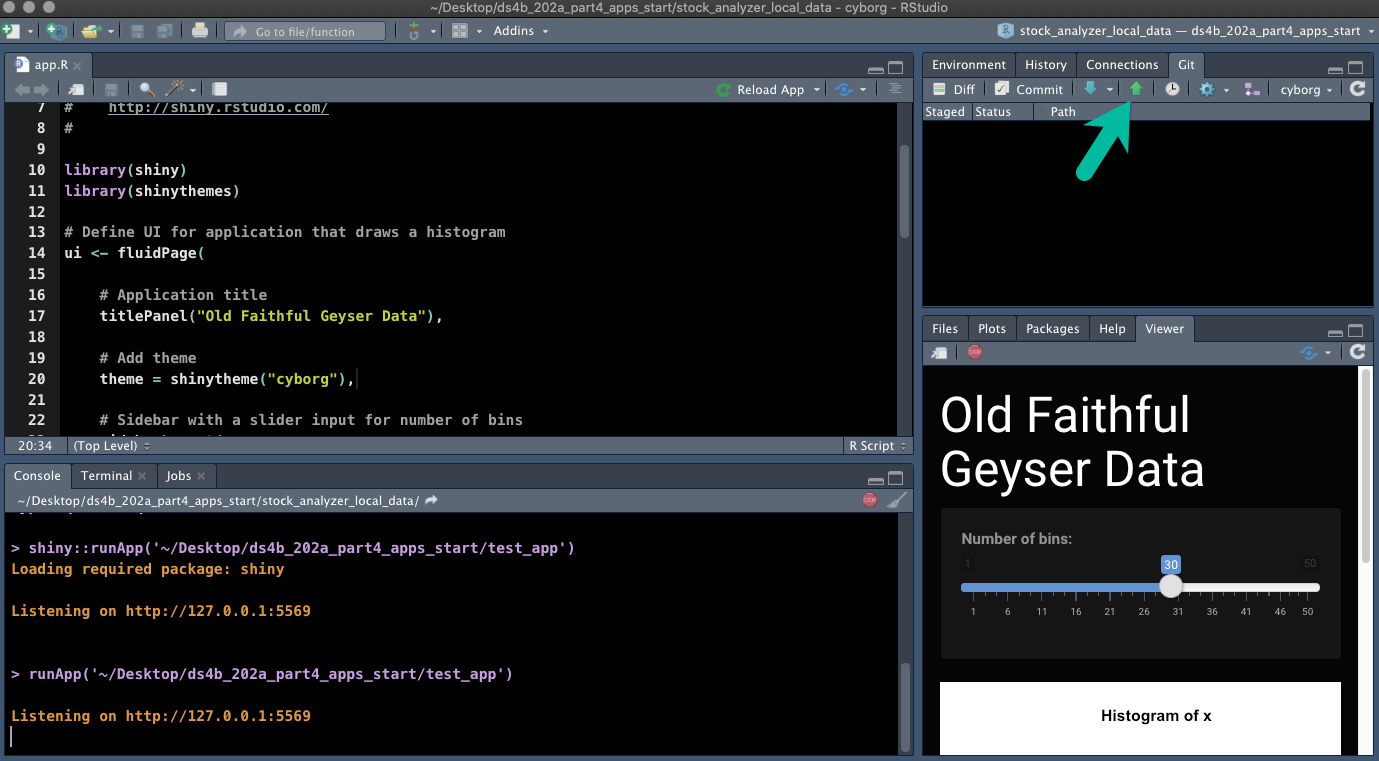
18.3.2.5 Step 5 - Push change to Remote
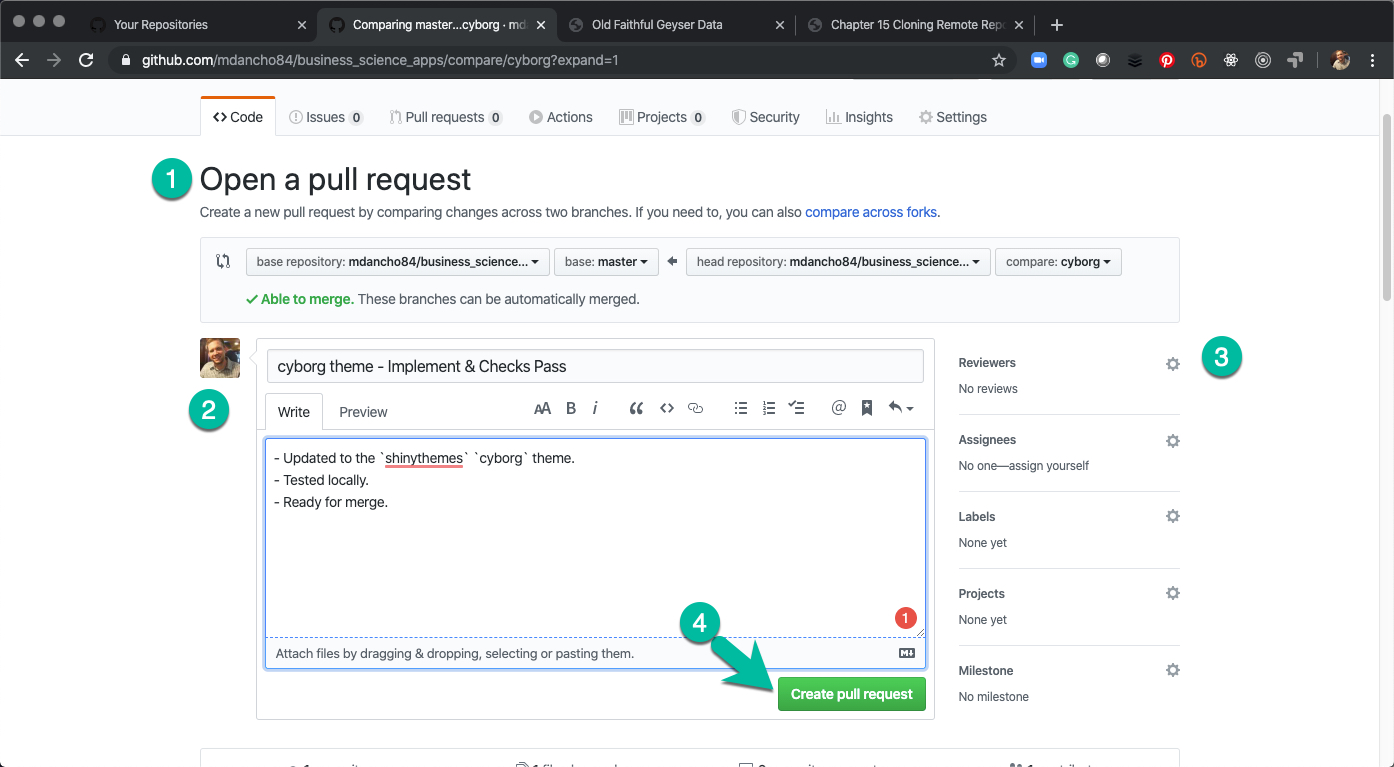
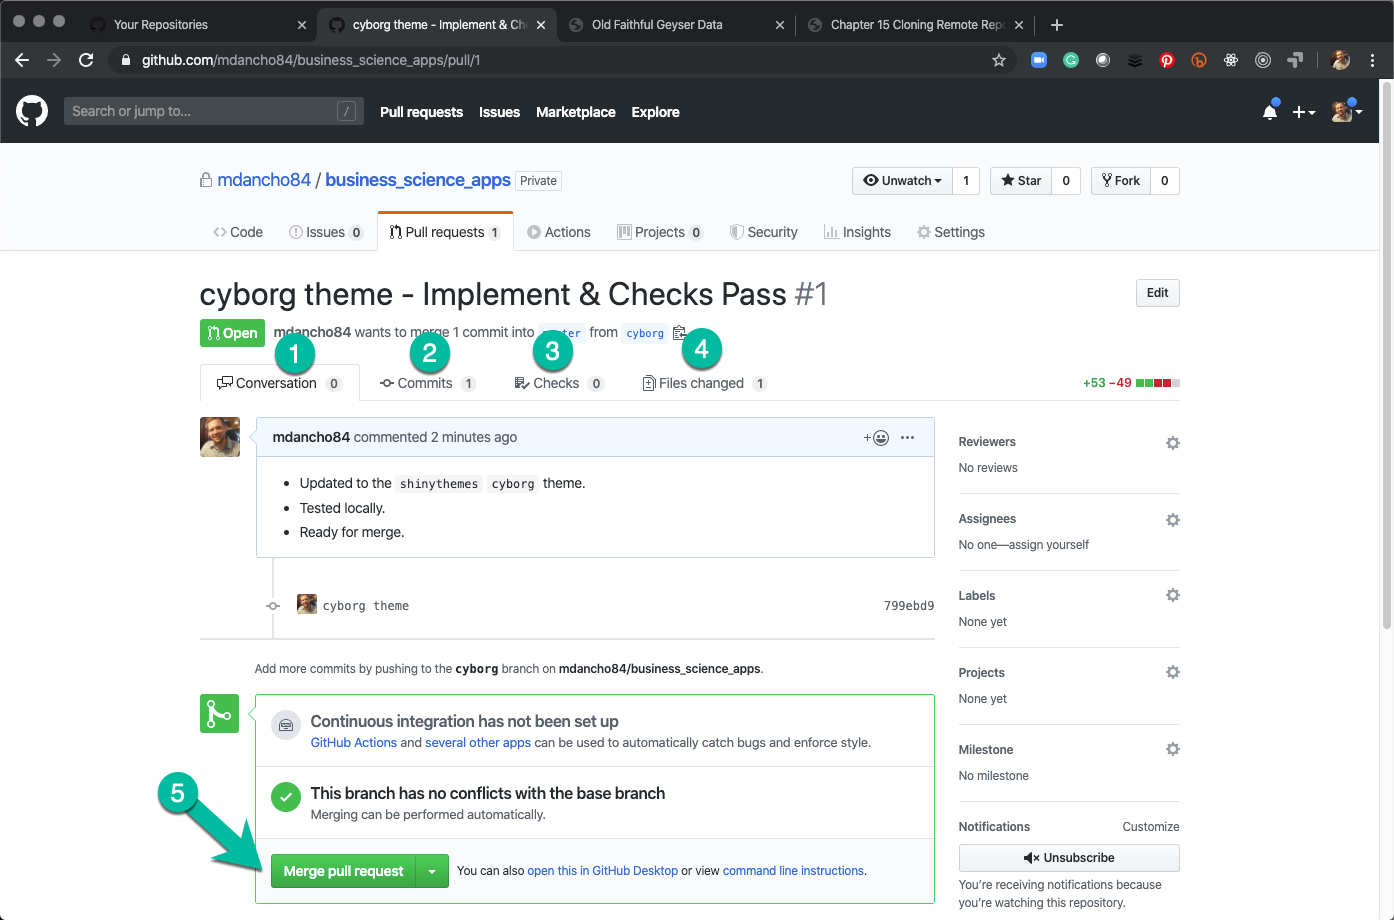
18.3.2.6 Step 6 - Open Pull Request
- Create the Pull Request by navigating to the Remote
- Add information about your review of the pull request
- Add any reviews if others on your team should validate the code
- Create pull request
18.3.2.7 Step 7 - Review Pull Request & Merge
The reviewer of the pull request is typically not the creator. The Reviewer should check out the conversation (1), investigate the commit history (2), investigate any checks (3), and review the file changes (4). Typically the reviewer will pull the branch and run the app as verification also. Once reviewed, the reviewer merges the Pull Request.
18.3.2.8 Step 8 - Merge Complete, Delete Branch
After the change has been merged, the branch is deleted on the Remote. Note that the branch will still exit on your Local Repository (we address this next).

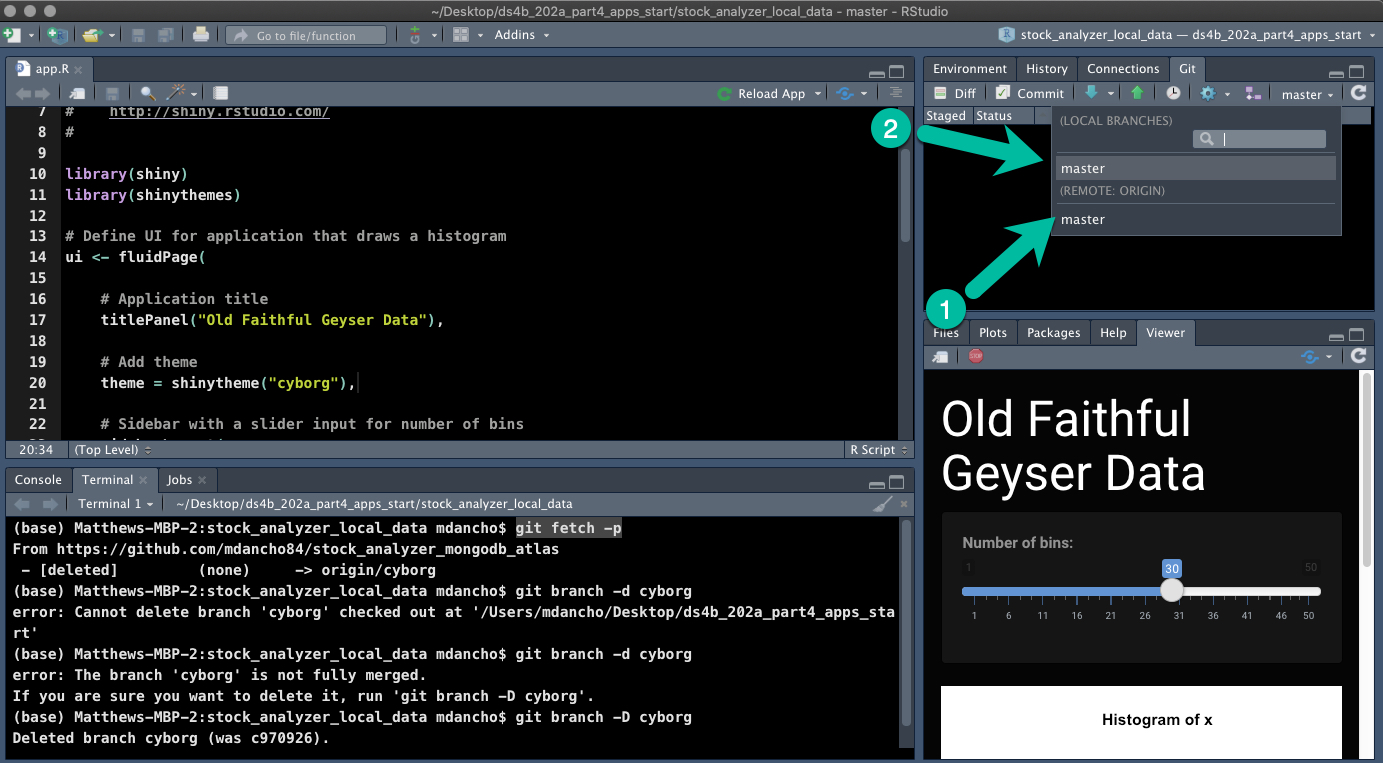
18.3.2.9 Step 9 - Delete local Branch
To update your local branch:
git fetch -p- Fetches and prunes the remote tracking on your local repogit branch -D cyborg- Deletes the local Cyborg branch on your local repo
18.3.2.10 Step 10 - EC2 Server, Clone Changes
1.git pull in your app directory.
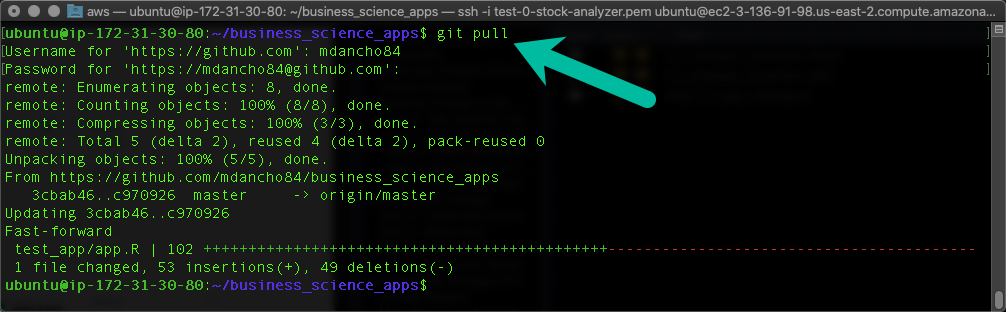
- App will automatically update to Cyborg theme.
18.4 Wrapup
Congrats! You’ve now successfully completed application change workflows. You did:
- A simple method - Designed for smaller changes on non-mission critical projects
- A complex method - Designed for teams, deployment, and massive changes to mission critical projects.
Become a Expert Shiny Developer with AWS
Have a question? Leave a comment.