Chapter 24 Application Library
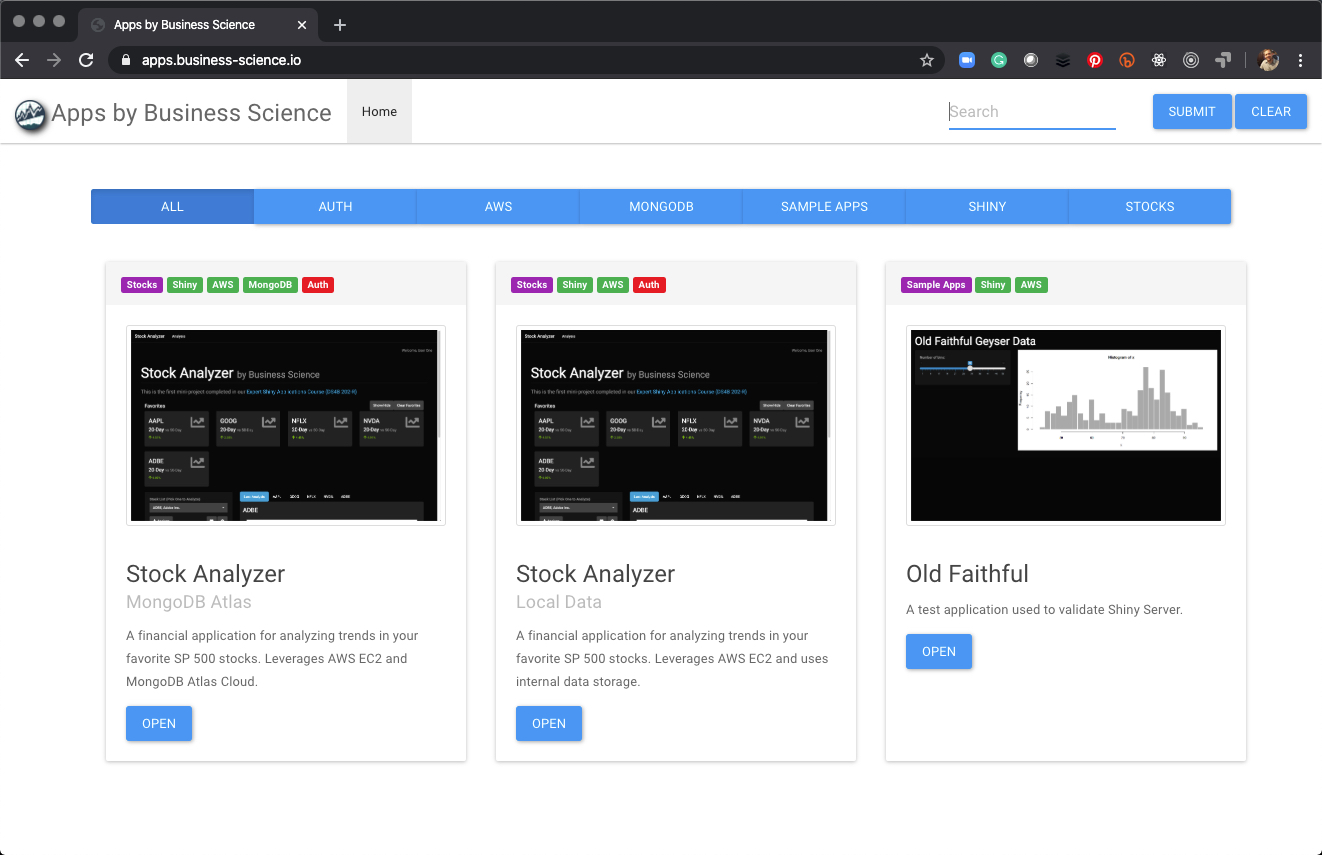
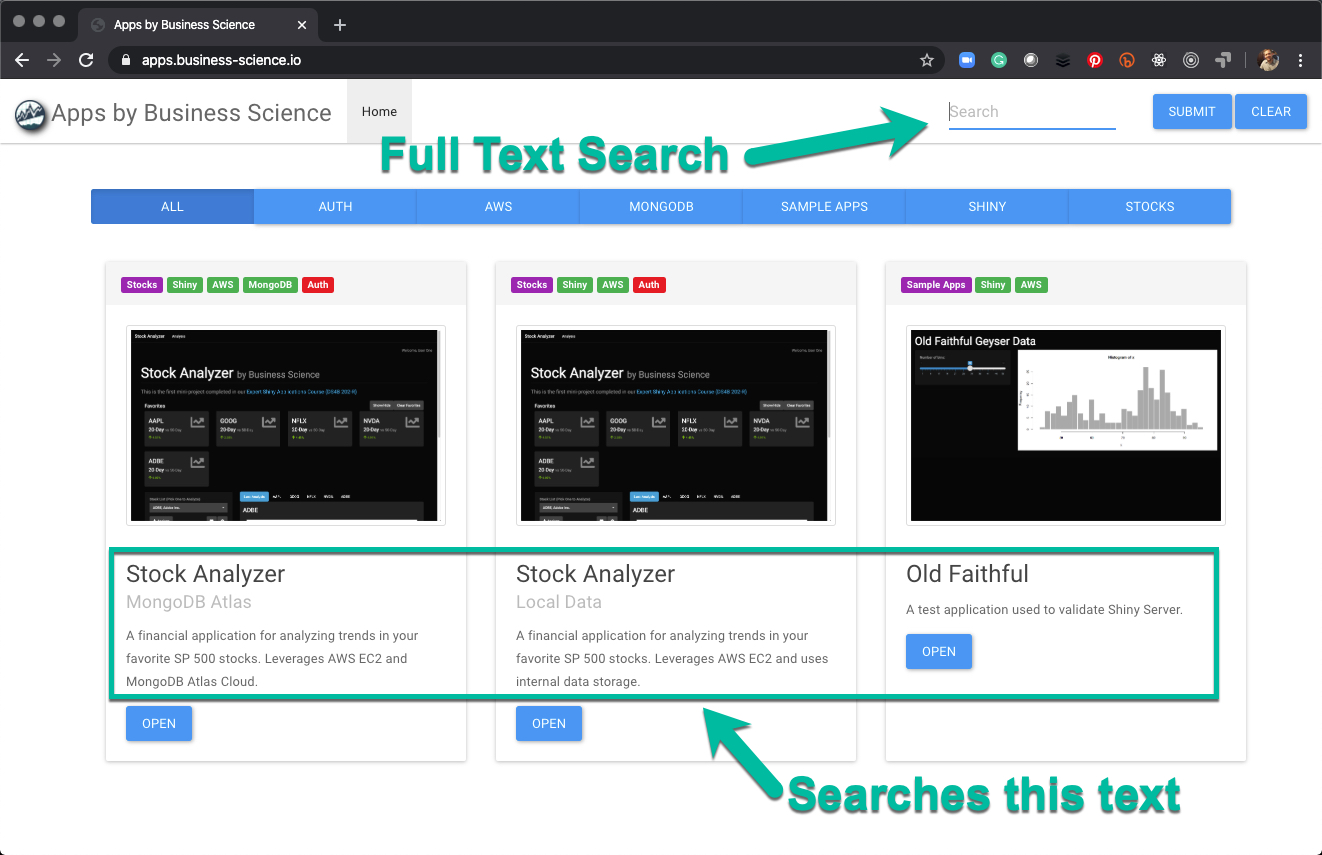
Our goal is to create an Application Library that contains the applications we’ve built. To do this we need to create a “meta-app” that lives in the home directory and allows users to navigate to our project applications. This is what we will create in the course, and we’ll host on AWS in this section by customizing the Shiny Server Configuration file.

24.1 Pre-requisites
Shiny Apps - Have AWS EC2 setup with 3 applications:
- Stock Analyzer MongoDB Atlas
- Stock Analyzer Local Data
- Old Faithful Test App
Docker Compose w/ Shiny & NGINX Running - Must have a
shinyand nginxwebservercontainer running with port 3838 exposed to the webserver. We will use docker compose to adjust theshiny-server.conffile inside of theshinycontainer.RStudio Running on Port 8787 - We will use RStudio as the text editor to modify the Shiny Server configuration file (
shiny-server.conf) anddocker-compose.yml.
24.2 Default Shiny Server Configuration
24.2.1 Default Shiny Hosting Structure
The default shiny server hosting model looks something like this where:
- Apps are located in directories that contain app.R files
- An
index.htmlfile is the landing page
24.2.2 Default Shiny Server Config File
To accomplish this hosting model, Shiny Server uses a configuration file that is very similar to the nginx.conf file we covered previously. The file is located at /etc/shiny-server/shiny-server.conf.
The key is the location / parameter
shiny-server.conf
24.2.3 Problem - We need an App as our Landing Page
We need to customize our application hosting model to enable a shiny app to run as our landing page as opposed to the index.html file.
24.3 Application Library - Shiny Server Configuration
24.3.1 Custom Hosting Model
The application configuration needs to be updated. Our Hosting Model looks like this with a new Application Library “Meta” App.
24.3.2 Custom Shiny Server Configuration File
To achieve the custom Hosting Model, we need to adjust the shiny-server.conf file to expose the locations of each of the apps. The main addition is that each of the directories that contain applications need to be specifically called to shiny server’s attention.
Custom shiny-server.conf
run_as shiny;

server {
  listen 3838;

  location /stock_analyzer_mongo_atlas {
    site_dir /srv/shiny-server/stock_analyzer_mongo_atlas;
    log_dir /var/log/shiny-server;
    directory_index on;
  }

  location /stock_analyzer_local_data {
    site_dir /srv/shiny-server/stock_analyzer_local_data;
    log_dir /var/log/shiny-server;
    directory_index on;
  }

  location /test_app {
    site_dir /srv/shiny-server/test_app;
    log_dir /var/log/shiny-server;
    directory_index on;
  }

  location / {
    site_dir /srv/shiny-server;
    log_dir /var/log/shiny-server;
    directory_index on;
  }
}
24.3.3 Docker Compose
The main change is the additional linked volume for the shiny-server.conf file. This replaces the default file with our custom Shiny Server configuration.
version: '3'

services:
  nginx:
    image: nginx:latest
    container_name: webserver
    restart: unless-stopped
    ports:
      - 80:80
      - 443:443
    volumes:
      - /home/ubuntu/rstudio_docker/nginx.conf:/etc/nginx/nginx.conf
      - /home/ubuntu/ssl:/ssl/
  shiny:
    image: mdancho/shinyauth:latest
    container_name: shiny
    restart: unless-stopped
    expose:
      - 3838
    volumes:
      - /home/ubuntu/rstudio_docker/shiny-server.conf:/etc/shiny-server/shiny-server.conf
      - /home/ubuntu/business_science_apps/:/srv/shiny-server/
      - /home/ubuntu/log/shiny-server/:/var/log/shiny-server/
24.4 Hosting the Application Library (Custom Shiny Configuration)
24.4.1 Step 1 - Create the Application Library Shiny App
Create the Shiny Application Library locally as app.R in the base directory of the business_science_apps project. Integrate critical features like Full Text Search, Application Tags, and open buttons that link to the appropriate URL subdirectories.

24.4.2 Step 2 - Push to GitHub & Pull Updates onto EC2
- Push changes to GitHub via the RStudio IDE integration.
- On EC2, navigate to the
business_science_appsdirectory. Rungit pull.
24.4.3 Step 3 - Kill and Restart Docker Compose
- Navigate to the location of the
docker-compose.ymlfile. - Kill the
shinyandwebservercontainers usingsudo docker-compose kill - Fire up the new
shinyandwebservercontainers usingsudo docker-compose up -d.
24.4.4 Step 4 - Test the Application
You should now have the Application Library running.

24.5 Wrapup
Congrats!! You now have a functional Application Library hosted on AWS that can be used to navigate your Shiny Applications. Great work.


Have a question? Leave a comment.