
Chapter 11 Docker Containers
This document covers the using docker container to run docker containerized environments on your EC2 Server. By the end of this, you will be able to deploy RStudio IDE in the cloud on AWS.
11.1 Prerequisites
Use docker image ls to list docker images. These are the images on our local server that we can run containers from. Make sure that you have:
rocker/shiny-verse- Image withShinyServer +tidyversepackages that runs on port 3838rocker/tidyverse- Image withRStudioServer (IDE) +tidyversepackages that runs on port 8787
11.2 Docker Run
The command docker run is used to run docker containers. This document is devoted to the run container command.
Use docker container run --help to see the list of the run options. Important Options:
--rmand-d- for development and deployment--rmremoves the container after the container session is completed and quit withCtrl + C.-druns the docker container in the background, which is how deployed applications will run on your EC2 Server.
-p <host_port>:<container_port>- Maps a host port (e.g. server’s port 80) to a container port (e.g. 3838, which runs Shiny Server)-v- Mount a Volume. Connects a virtual volume (directory where files are stored) to a local volume on your EC2 Server.
11.3 Development
When building apps, we’ll be using docker run --rm ... where --rm kills the container as soon as we’re finished.
11.3.1 Shiny Server - rocker/shiny-verse
Run Shiny Server with the rocker/shiny-verse container in development mode (--rm runs interactively) and map virtual port 3838 to local port 3838:
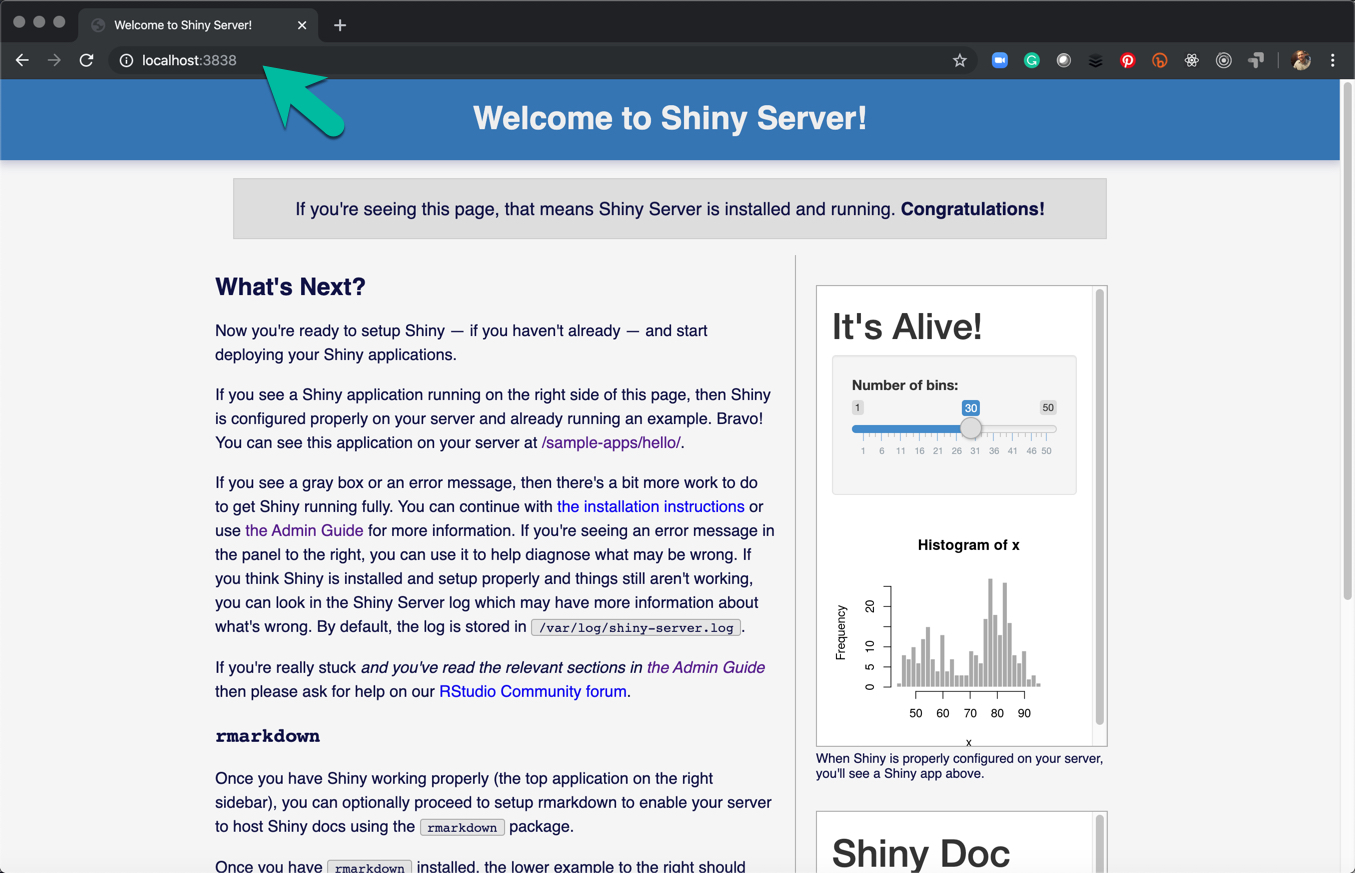
sudo docker run --rm -p 3838:3838 rocker/shiny-verse- Navigate to the port 3838 of your IP. If running on an EC2 server, use your
public_IPV4:3838. If running locally (on your PC or Mac), you can uselocalhost:3838to open shiny server. - Congrats - You know have
ShinyServer running. - Use
Ctrl + Cto kill the shiny server and shutdown the container.
11.3.2 RStudio Server - rocker/tidyverse
Run RStudio Server with the rocker/tidyverse container in development mode (--rm runs interactively) and map virtual port 8787 to local port 8787:
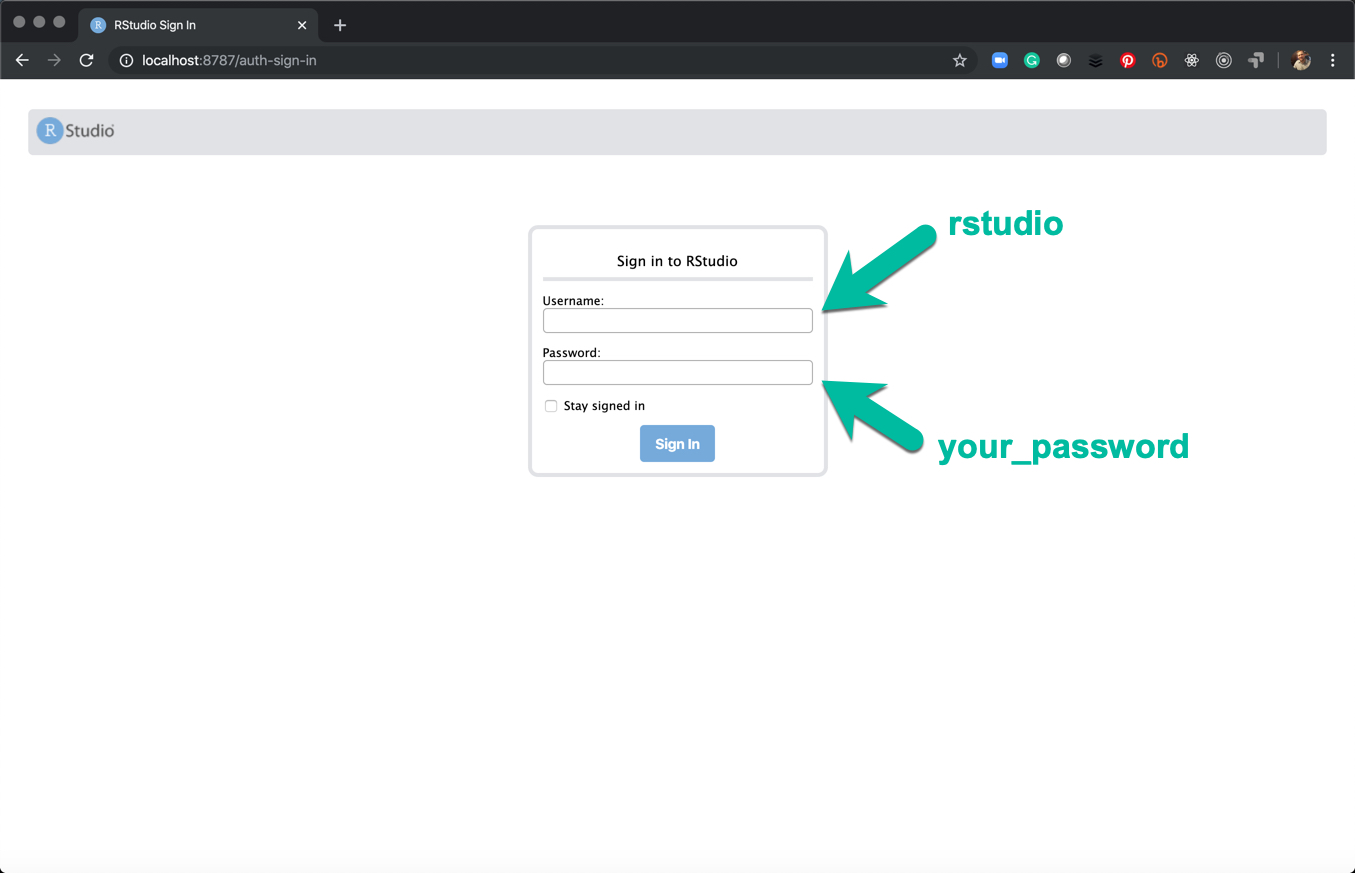
sudo docker run -e PASSWORD=your_password --rm -p 8787:8787 rocker/tidyverse- replace “your_password” with a better password- Navigate to the port 8787 of your IP. If running on an EC2 server, use your
public_IPV4:8787. If running locally (on your PC or Mac), you can uselocalhost:8787to open RStudio Server IDE. - Username & Password - Use username = “rstudio” and password = the password set using the environment variabl
-e PASSWORD=your_password. - Congrats - You know have RStudio Server running.
- Use
Ctrl + Cin the Terminal to kill the RStudio server and shutdown the container.
11.4 Deployment
11.4.1 Running in Detached Mode
Running in “detach” mode (docker container run -d) is necessary to run docker containers in production. The advantage is we can have multiple docker containers running and running in detach mode does not tie up the terminal.
sudo docker run -e PASSWORD=your_password -d -p 8787:8787 rocker/tidyverse- The docker container is run in “detached” mode using-d, which runs the process in the background - This is exactly what is needed in production since the server’sdocker container ls- List the active containers. Note that your server can have multiple containers running concurrently.docker container stop [CONTAINER ID OR NAME]- To stop a container.
11.4.2 Linking Volumes
You may notice that Docker Containers don’t save any files after the container is stopped. This is an important concept because Docker Containers are virtual environments - Files, directories, and any software downloaded inside the container environment does not persist.
For files and directories that (1) exist on the host server but need to be used in the container session or (2) need to be saved from the container session to the host server, we can connect the two environments by linking volumes.
Format to Link Volumes:
-v <host_dir>:<container_dir>
11.5 Example Workflow for Deploying RStudio Server
This is an example of deploying an RStudio Server on your AWS EC2 Server. The deployed version will:
- Be developed in development mode using
--rm - Have volumes linked to a directory on the EC2 Server
-v - Be deployed in detached mode using
-d
11.5.1 Step 1 - Create a Directory
In your AWS EC2 Server, navigate to /home/ubuntu and mkdir rstudio_docker. This creates a directory that we will link to the container.

11.5.2 Step 2 - Change Permission
sudo chmod 777 rstudio_docker/ - This ensures that the RStudio Server will be able to write to the new directory.

11.5.3 Step 3 - Run Docker Container with Linked Volumes
Run the following code. The code runs RStudio in development mode linking the your EC2 server’s “rstudio_docker” directory located at: /home/ubuntu/rstudio_docker to your RStudio IDE running in a container at: home/rstudio/rstudio_docker.
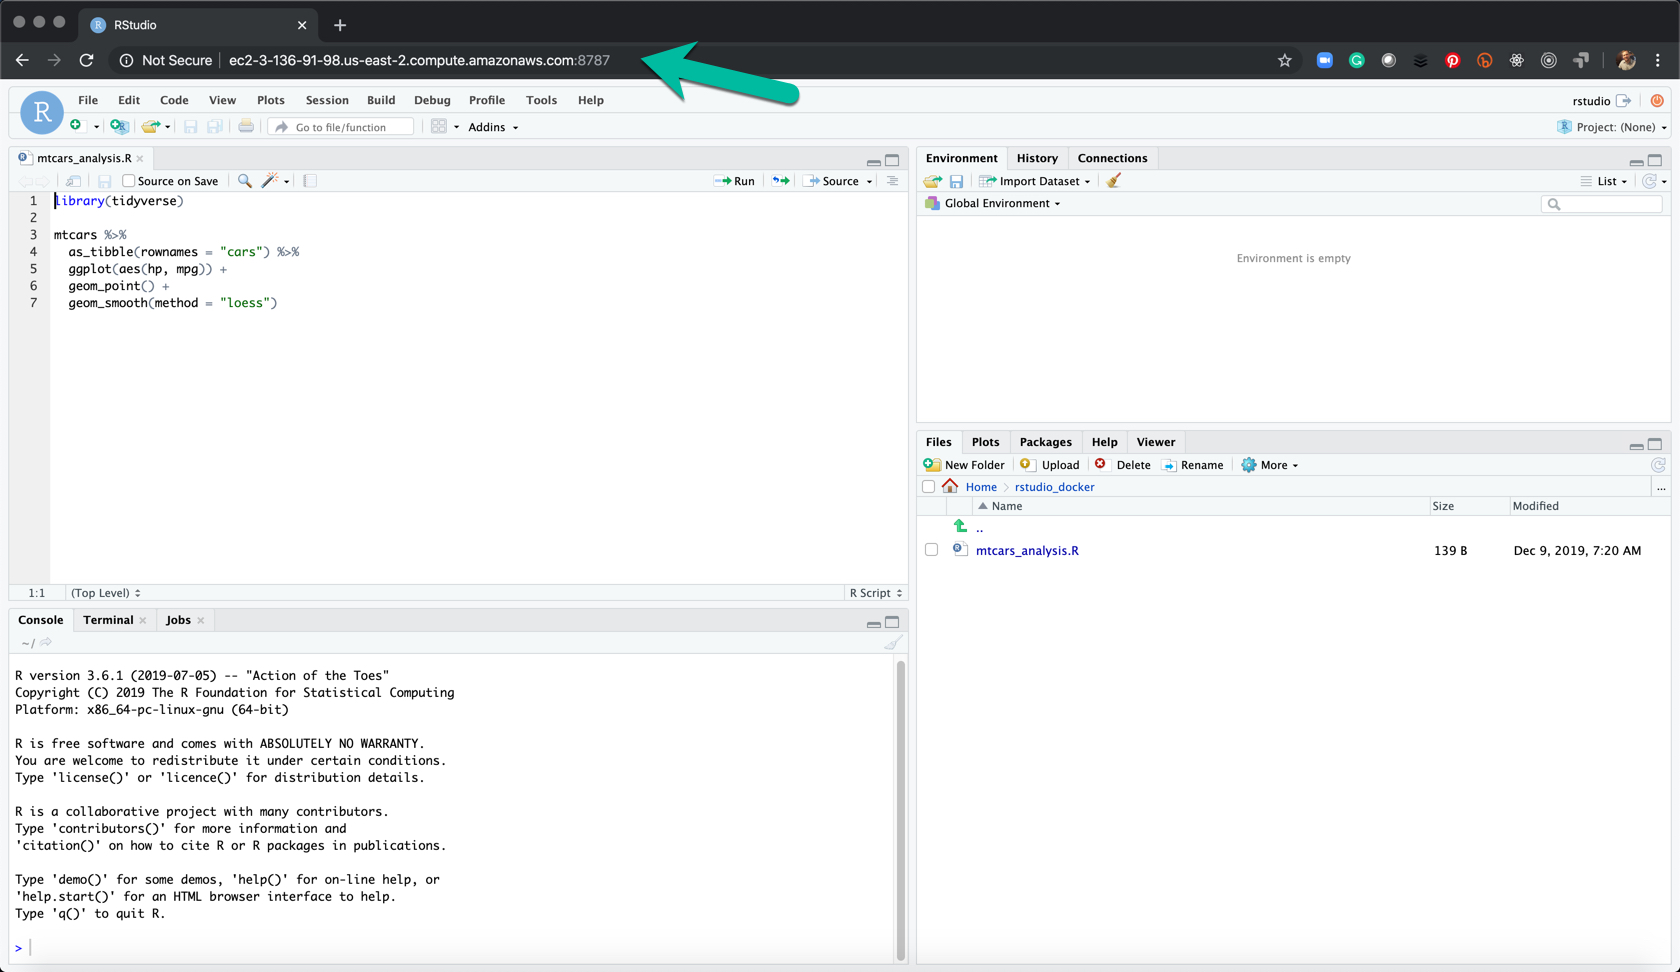
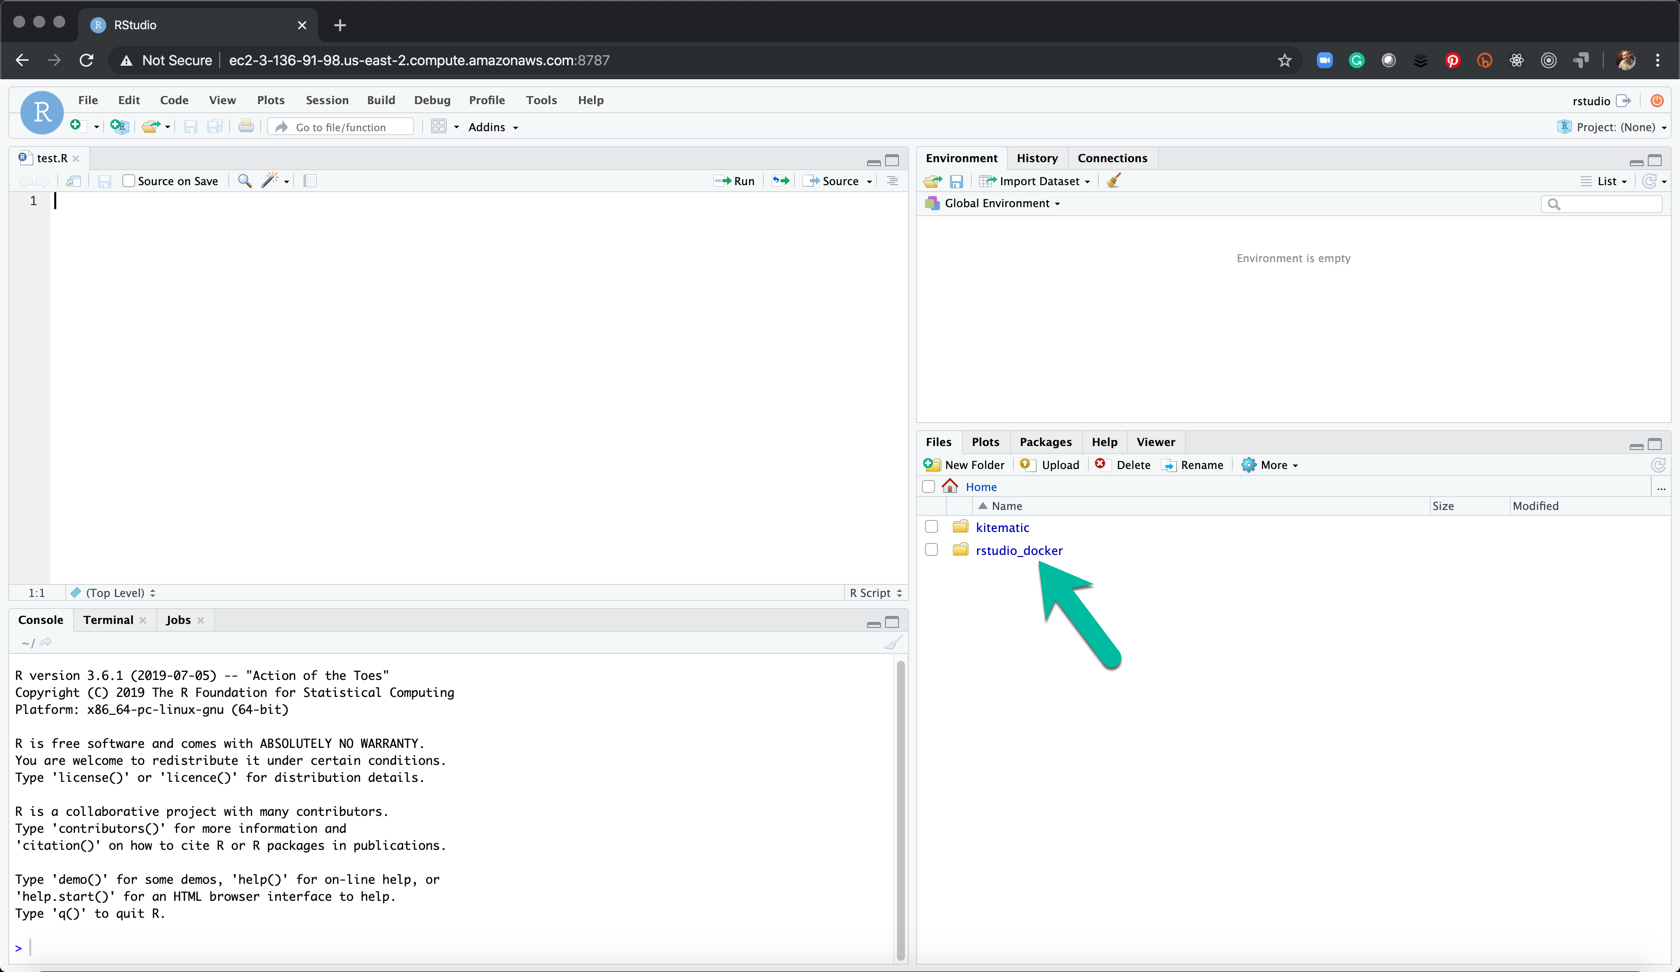
11.5.4 Step 4 - Navigate to Your Server’s RStudio Session
You should now see a folder in your “Files” pane inside of RStudio.
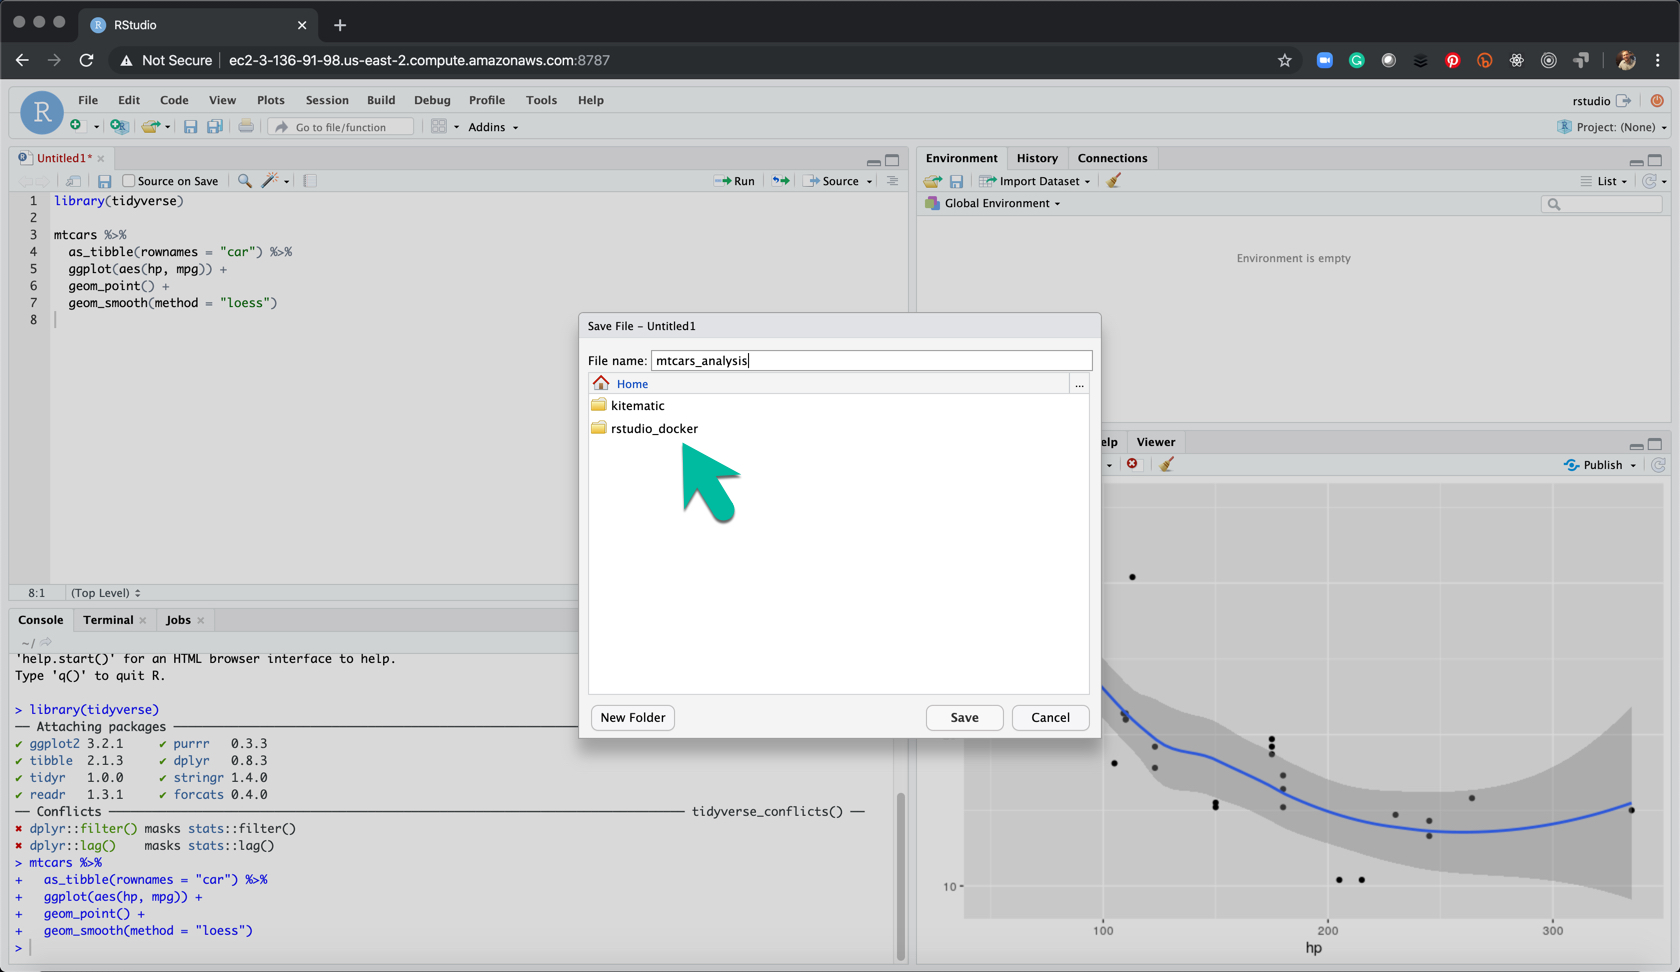
11.5.5 Step 5 - Make a File
Make a quick mtcars analysis.
11.5.6 Step 6 - Save the Analysis in Your rstudio_docker Directory
Save the analysis in the “rstudio_docker” folder. Note - You will get an ERROR if your permission was not correctly setup in Step 2.
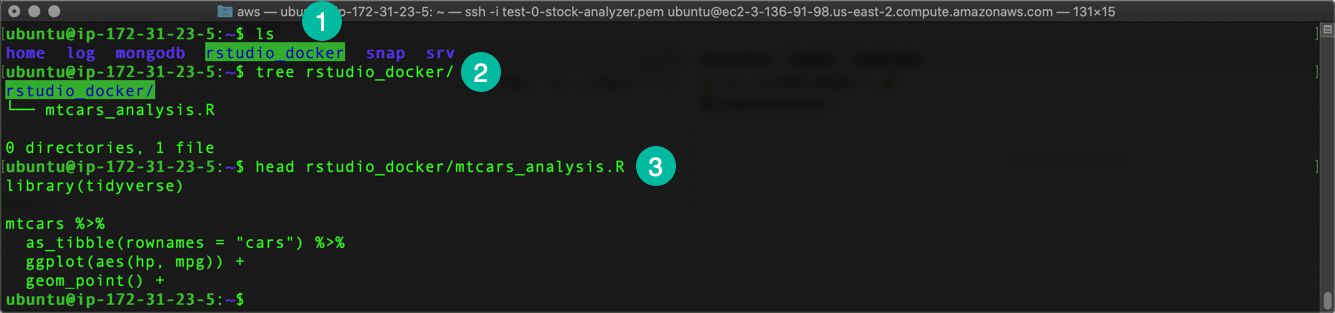
11.5.7 Step 7 - Check Your File on EC2
Once finished creating an analysis file, Ctrl + C to exit the RStudio Session. Then verify the file was created properly by:
lsto list the filestree rstudio_dockerto run tree inside the “rstudio docker” folderhead rstudio_docker/mtcars_analysis.Rto check the first 6 lines of the analysis file.
11.5.8 Step 8 - Run in Detached Mode
Once the volumes are linking properly, deploy the RStudio Server on port 8787 with the linked volume.
11.5.9 Step 9 - Verify the Deployed Container
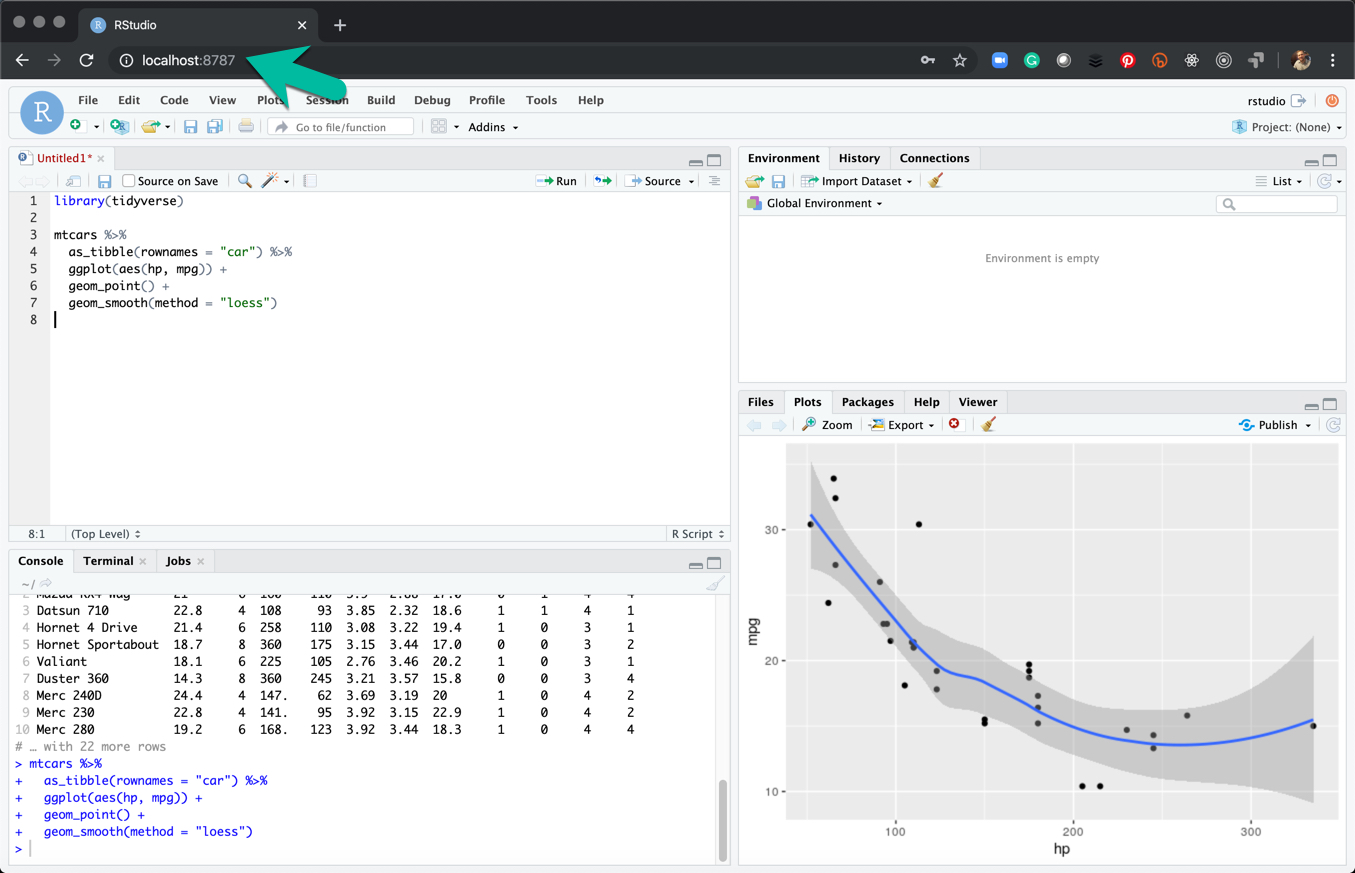
Run sudo docker container ls to verify the deployed container is running.

Go to your EC2 Server’s port 8787 to see the RStudio Server hosted in the cloud.
11.5.10 Step 10 - Adding a User Name
You can add a user name by adding a second enironment variable and changing the path of the linked volumes.
sudo docker container stop- Usestopto stop the existing container.
-e USER=your_user_name- Update your user name for the RStudio Login.-v /home/ubuntu/rstudio_docker:/home/your_user_name/rstudio_docker- Change the volume links to match your updated user name.
11.6 Wrapup
You’ve successfully launched your own RStudio Server in the AWS Cloud. We’ll use this later for making DockerFiles.
If at any time you want to shutdown, just use docker container ls to list your active containers. Then use docker container stop [CONTAINER ID].
Become a Expert Shiny Developer with AWS
Have a question? Leave a comment.